Is the countertop in your kitchen appearing dated? Not to worry. After years of use, a kitchen countertop will often lose its luster. One fast approach to alter the appearance of your kitchen is to replace the countertop.
For you, I’ve compiled the greatest do-it-yourself kitchen countertop ideas. You’ll no doubt locate the ideal countertop for your kitchen.
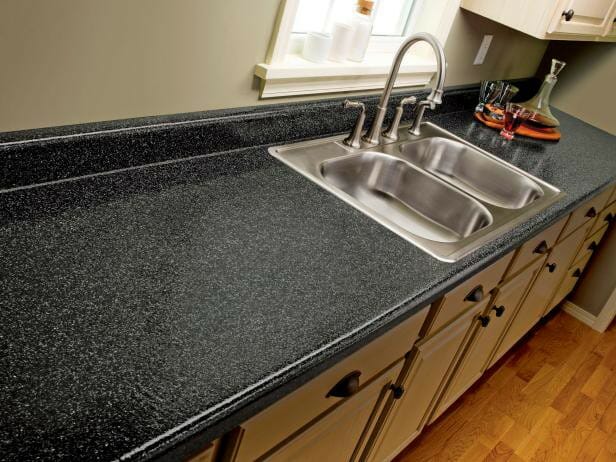
Go Faux Granite
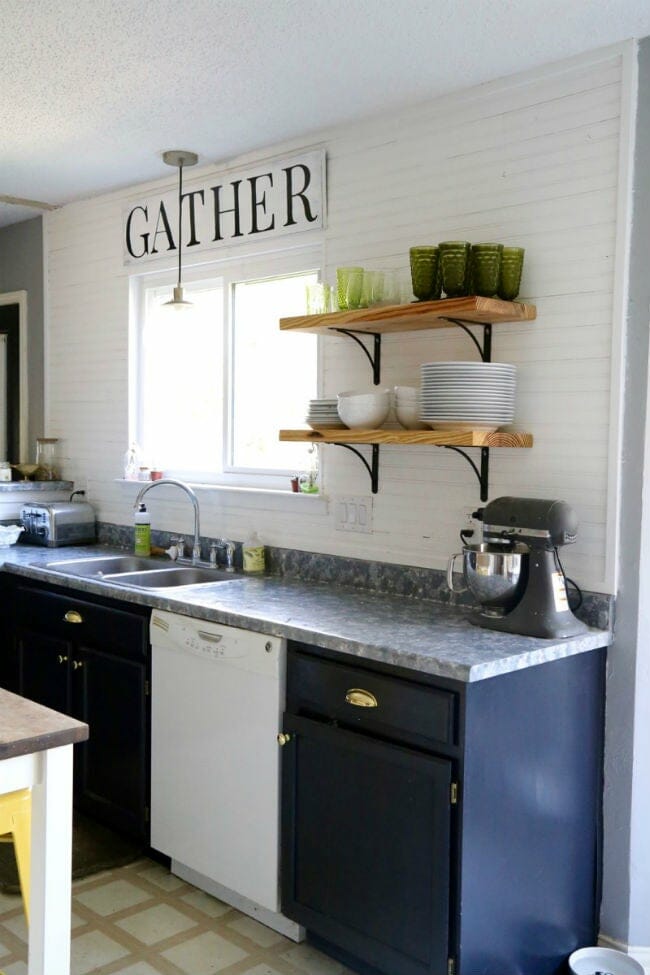
Would you rather have natural stone countertops than your gloomy and dirty laminate ones? You don’t necessarily need to demolish them in order to realize your design vision.
The secret to creating a believable faux granite, as demonstrated in this DIY from Love & Renovations, is selecting three hues of paint (here, from black to gray) and dabbing with a sea sponge.
The price to replicate the opulent appearance is less than $50, even after adding a clear protective top coat. And one do-it-yourselfer thinks she would repeat the process even a year later.
DIY Tiled Countertop
Have you ever utilized a countertop made of tiles? I have, and it’s a fantastic experience. Consider employing a tiled kitchen countertop if you’re trying to update your current kitchen countertop. Making it is simple. You may learn how to create one by following this instruction.
Consider Kitchen Countertop Materials And Style
Before you decide to replace your countertop, you should bear a few guidelines in mind. Have a clear concept of the counter’s thickness, length, color, durability, and overall cost, which includes the cost of purchasing and maintaining the counter.
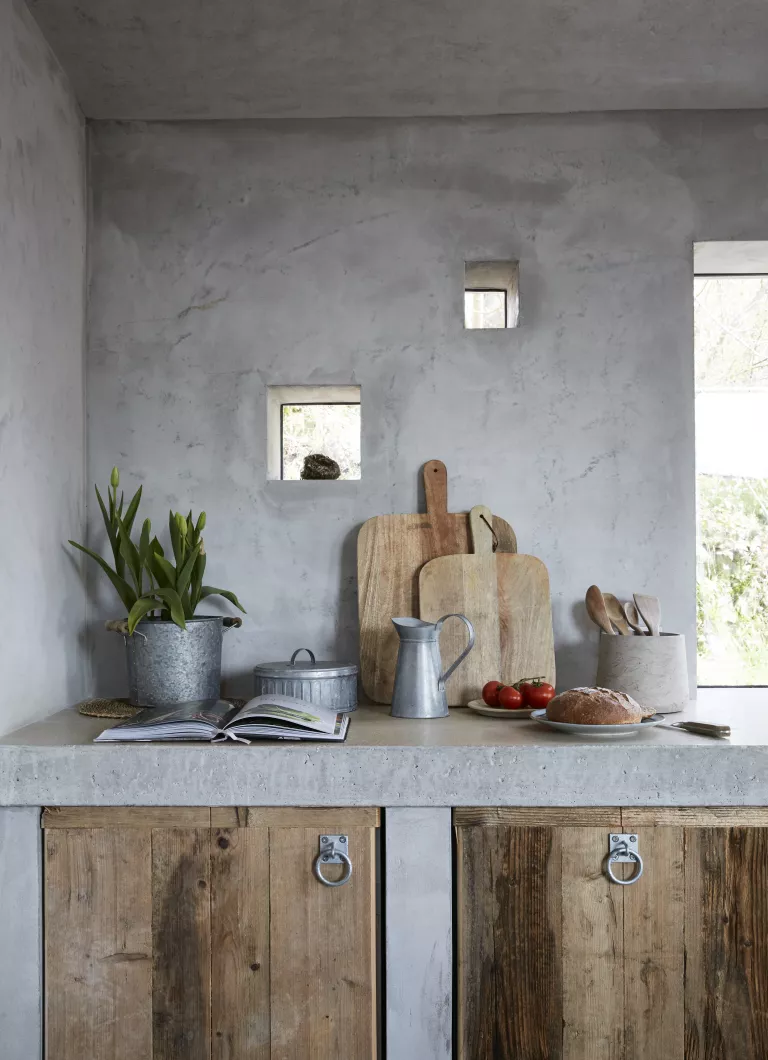
Choose Concrete

Concrete is becoming more and more common for DIY countertops, and for good reason—inexpensive, it’s strong, and pretty dang cool-looking. Thank goodness Imperfectly Polished breaks everything down into three easy-to-follow tutorials: preparation and planning, pouring and curing, and sanding, sealing, and enjoying.
Replacing A Contact Paper Countertop
Changing the contact paper is often all that’s required for a total kitchen countertop makeover. Do you like the countertop in the previous picture of the kitchen? Here is a DIY idea on how to entirely remodel your home with contact paper.
Things To Keep In Mind With Diy Kitchen Countertops
It might be challenging to select the ideal kitchen countertops for you in the gorgeously vast and opulent world of kitchen countertops. Keep a few things in mind if you’re redesigning a kitchen and want to do it yourself or want to give the counters a certain style.
The most common materials used in DIY kitchen projects are wood, concrete, epoxy, and repurposed glass. In any case, the price is influenced by the materials you choose. Any material must be easily accessible, affordable to transport to your home, and simple to work with using common equipment in order to be considered DIY-friendly.
All-natural stone and quartz slabs obviously fall short of the requirements since they are heavy, difficult to cut, and even difficult to lift. Today’s homeowners have a wide range of options, colors, and selections. We like using white laminate countertops in our designs to give kitchens a big, open, and bright look. Vinithra Amarnathan, creator of Weespaces(opens in new tab), adds, “We also prefer the use of softer neutral tones like beige and grey that add in a bit of color and warmth to a kitchen.”
Pinch Pennies
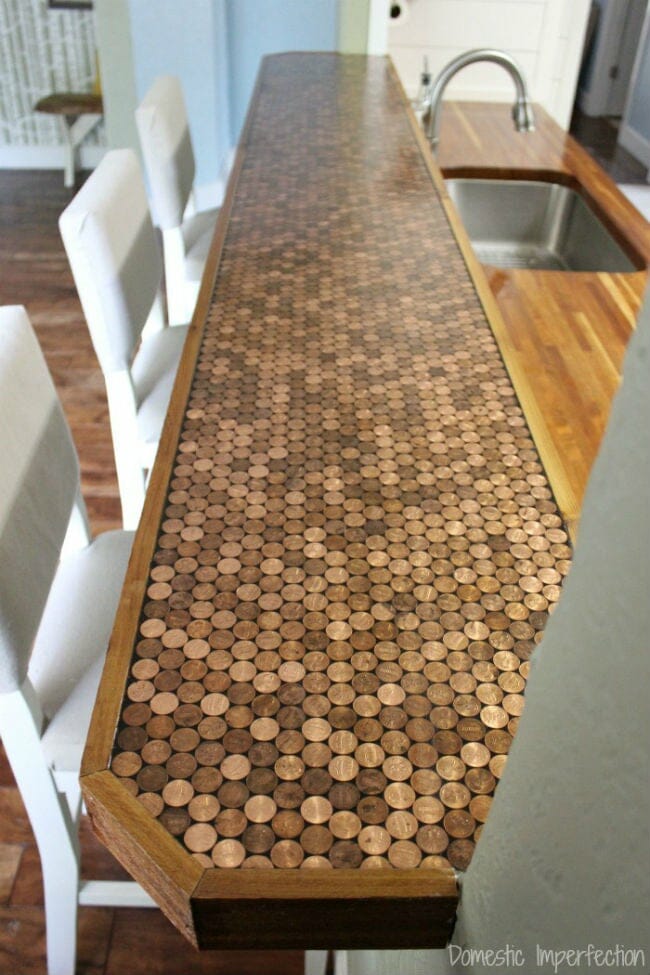
Pennies have previously been used to surface floors and backsplashes. Domestic Imperfection now shows how they can make DIY countertops appear like they cost a million dollars. The price? Precisely pennies! Pebbles, vase jewels, coasters, and license plates are some further unusual tabletop materials.
DIY White Concrete Countertop

The strongest type of countertop you may have in your kitchen is eventually one made of concrete. You may learn how to construct a concrete countertop by working on this DIY project.
Opt For Chic And Affordable Laminate
When it comes to laminating the count, there are a ton of color options, and it’s the ideal material for a modern, minimalist kitchen. Installing new laminates over outdated countertop surfaces is the most cost-effective course of action.
To do this, thoroughly clean the surface with sandpaper to get rid of any dirt and impurities. Next, you must sketch a schematic of the countertop’s shape and measure the countertop’s measurements. You can cut the laminate sheet easier with this.
Remember to account for the edges while measuring so that your sheets need to be trimmed maybe an additional inch longer. To cut the sheet laminate, use a specific blade, such as a utility knife. It’s time to paste now.
Contact cement, which has to be brushed on top of the countertop surface, can be used to apply plastic laminates. Use the same material to cover the rear of the laminate cutout after spreading a smooth, equal coating of it.
Give the glue time to dry (check the contact cement label for recommendations). Now spread out the wood strips on the countertop about a foot apart. Don’t worry, they won’t stick. These strips serve as barriers between the sheet and the current countertop. The sheet should now be placed lightly on the wooden strip.
The sheet should now be pushed down onto the counter using a J-roller after the initial wooden strip or dowel has been removed. On ensure there are no air bubbles, apply pressure to the sheet with the roller. Apply pressure and cut any superfluous pieces.
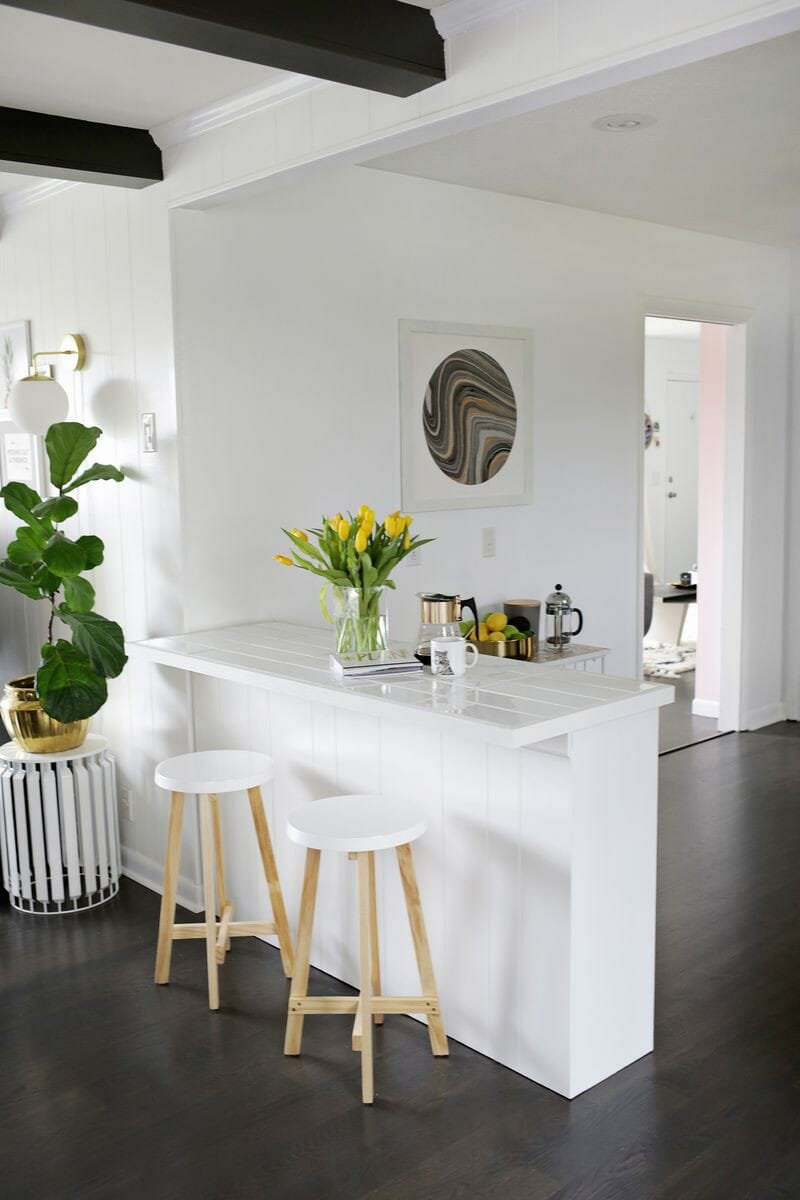
Ride The Subway Trend
This under $100 subway tile countertop idea from A Beautiful Mess makes once-dark and cramped kitchens appear light and airy. It is the ideal companion to a subway tile backsplash.
Create it by screwing a wooden board the size of your countertop to a cement backer board, attaching subway tiles and grout, and then installing the complete tiled board on your current countertop. Even if it may sound serious, their thorough instructions guarantee that these DIY countertops can be made without saws!
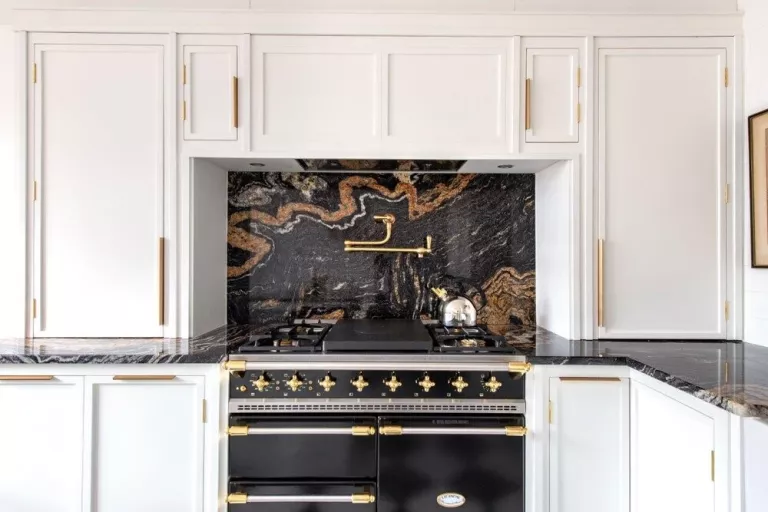
Painting Kitchen Countertop With Giani Granite
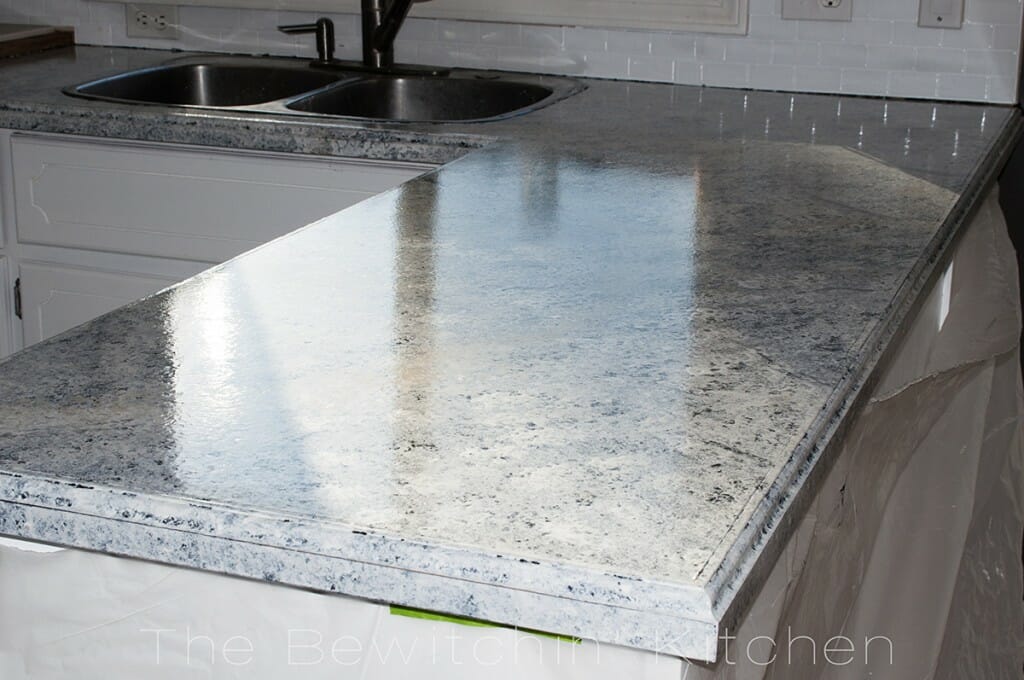
Maybe all your kitchen countertop needs is a coat of paint. The beauty you are witnessing was created with paint for this DIY kitchen countertop design. I don’t think the photograph does this countertop’s beauty justice. Your kitchen countertop may receive the same treatment.
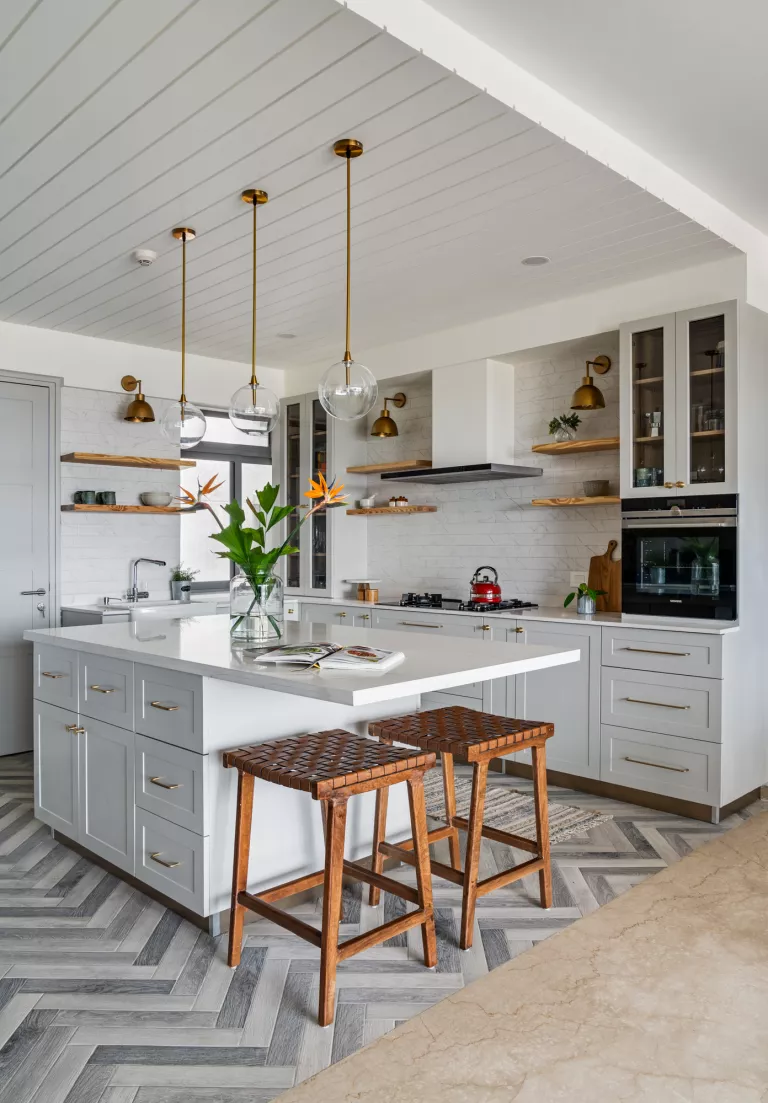
Add An Overlay For An Industrial Diy Countertop
Consider using overlays for some industrial kitchen design ideas. Compared to installing a brand-new solid quartz or concrete worktop, this is less expensive. All you have to do is make sure your counter is sturdy, level, and unbreakable if something is placed immediately on top of it. Don’t stress if the slabs don’t completely match if you’re using concrete dye. Small variances give the counter a distinctive appearance.
Tape the kitchen entrances and handles with plastic tapes or a cloth before you begin the task. You don’t want to spend hours clearing up a mountain of dust that the DIY technique will produce. Wipe the kitchen backsplash and the countertop with a moist towel.
Clean up all the dust after sanding the countertop. Check the directions on the container before making your first batch of concrete mix. Your mixture should ideally have the consistency of pancake batter. Using a drill, mix it (set on low).
Now wait five minutes for the bubbles to all rise. Apply a small coating to your countertop once it has had time to settle. Let it air dry for the next two hours, if necessary. Sand the coating to make it entirely even when it has dried. Depending on how thick you want the countertop to be, you may now apply another layer of concrete.
So that the surface is constantly even, keep sanding. Once the concrete is dry and has reached the desired thickness, seal it with a quality market sealer.
Chalk It Up To Creativity
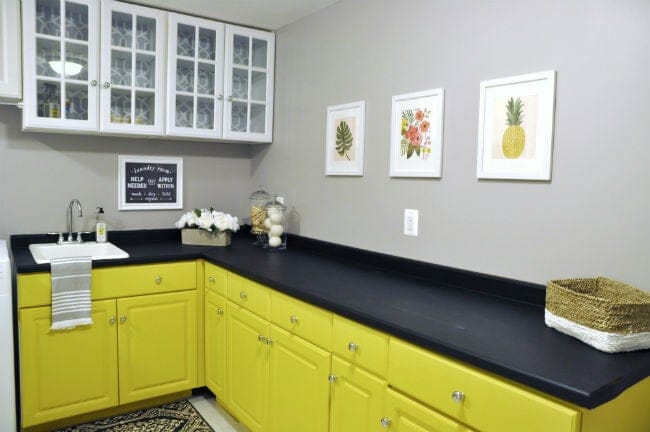
Although chalkboards are often associated with scratched notes and children’s drawings, the creative DIYer behind Kate Decorates noticed that slate, a high-end stone countertop material, closely mirrored the matte surface of the blackboard medium. She adds elegance to the laundry area for under $50 and two coats of blackboard paint and a clear protective finish.
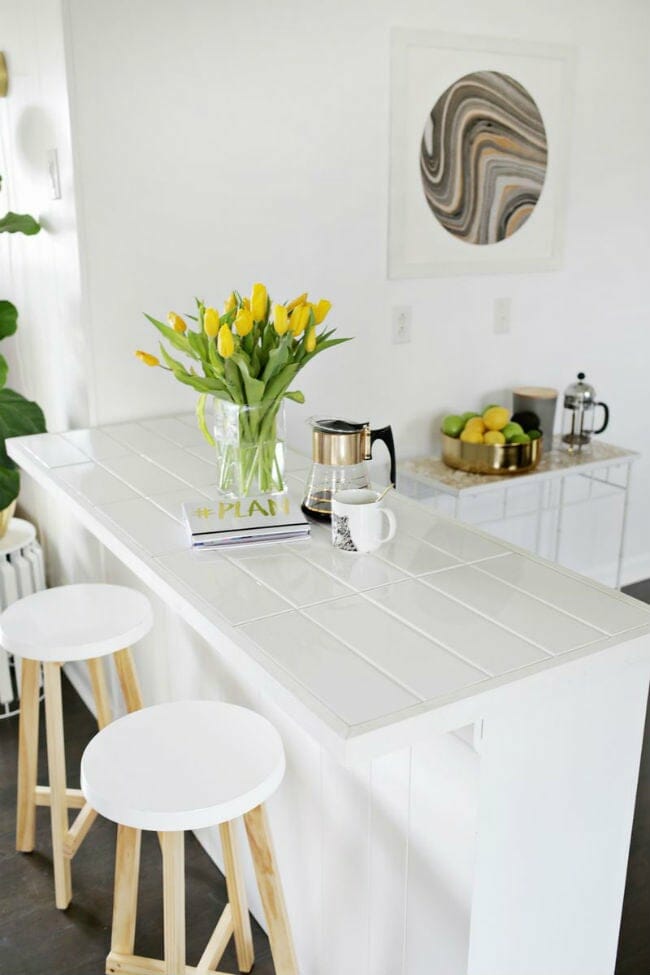
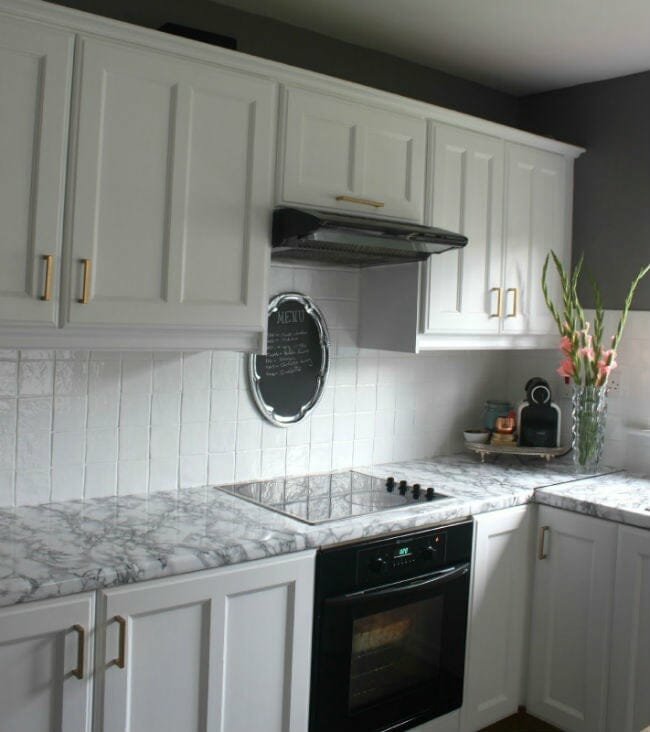
DIY Faux Marble Countertop
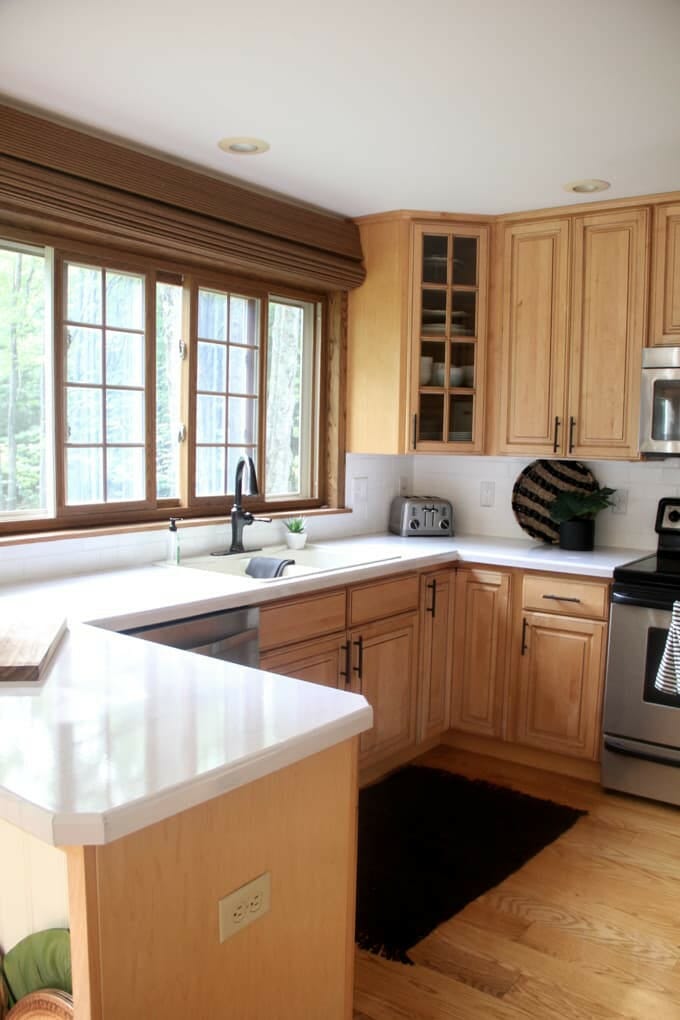
Look at this gorgeous white countertop in detail. Is that a marble? is the first thing that springs to mind. Nope. It’s not. The substance is paper. If you’re not happy with your kitchen countertop, you may do what the creator in the image above did and change it.
Experiment With Self-Adhesive Sheets
Try contact paper for a simple yet effective kitchen concept since it may imitate the appearance of marble, granite, or wood. These come in rolls and have a sticky backing that is coated in a protective film and a waterproof side. They resemble surface stickers and may even be placed inside drawers and cabinets.
Clean the countertop to prepare it for the project, then let it to air dry. Trim the paper’s additional edges before laying it out on the countertop. In order to exactly put the film in, start with the back corner and leave a small overhang. Trim the surplus material. As you remove the paper backing, push it firmly on the counter. Remove air bubbles from the surface by rubbing it with a smoothing instrument. Simply cut away the folds with a utility knife anywhere you notice excess edges.
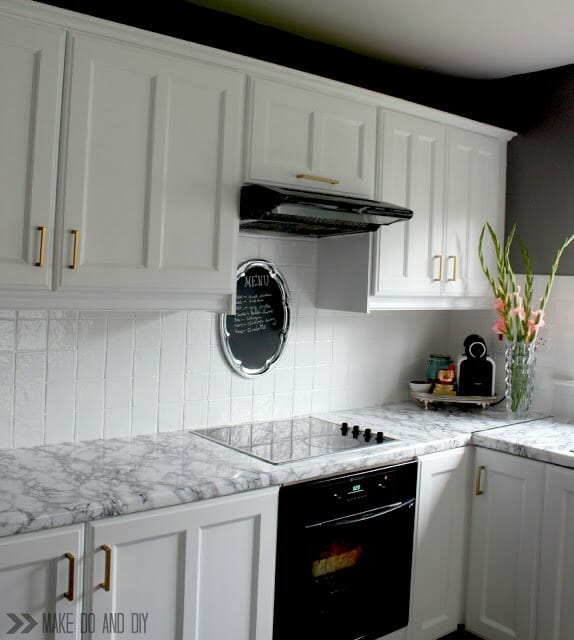
Make Contact
Genuine marble slab countertops may be expensive and, in the event of a poor installation, they may potentially damage your expensive work surface.
Not the case with this ridiculously inexpensive imitation from Make Do & DIY. The blog’s creator spent about $30 to replicate the exquisite, striated appearance of marble in her kitchen by using marble-patterned contact paper and a credit card to smooth out any blemishes.
DIY Butcher Block Countertop
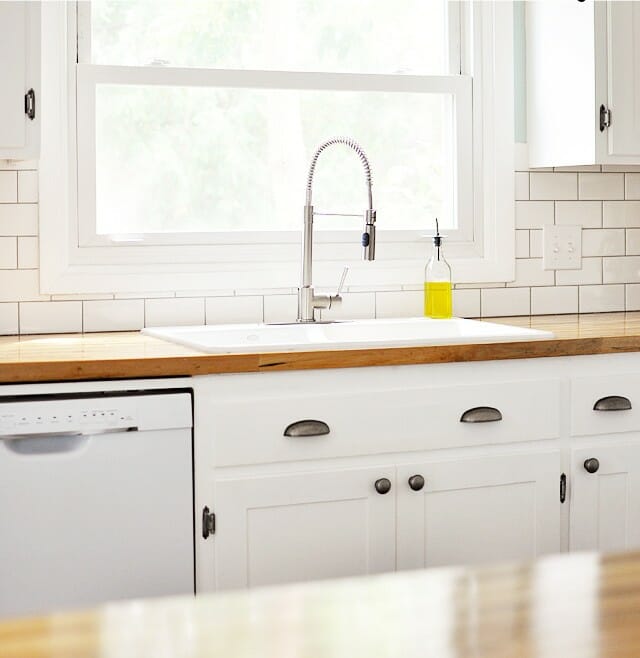
Many people have told me that butcher block counters are the greatest ones for cutting on. This is only partially accurate, in that butcher block counters are the easiest to keep clean, the best for cutting on, and also very inexpensive. Learn how Ashely installed a butcher block countertop in her kitchen in this do-it-yourself guide.
Paint A Countertop (With Caution)

Painting wooden kitchen countertops is ideal since the wood can absorb the color and, once sealed, can give the counter a fresh, new look for a very long time. Laminate surfaces may also be painted, however acrylic paints must be used and sufficient preparation must be made. Why not try painting the kitchen cabinets while you’re at it?
Sand the counter’s surface with 150-grit sandpaper, if necessary. With a little moist cloth, completely remove any dust and debris from the counter, then allow it to dry. Use a paint roller to put on a light, uniform layer of primer. Check the box’s drying directions. Applying the second layer comes after allowing the primer to completely dry.
Once the surface is prepared, begin mixing the paint in, giving each layer enough time to dry in between. Give it a second layer after letting the first coat dry and applying it evenly. After it has dried, seal it. Make sure the resin is uniformly dispersed after carefully pouring it over the painted surface. Make careful to explode any bubbles you see by holding a blowtorch a few inches away and directing it towards them.
Do Your Kitchen A Solid
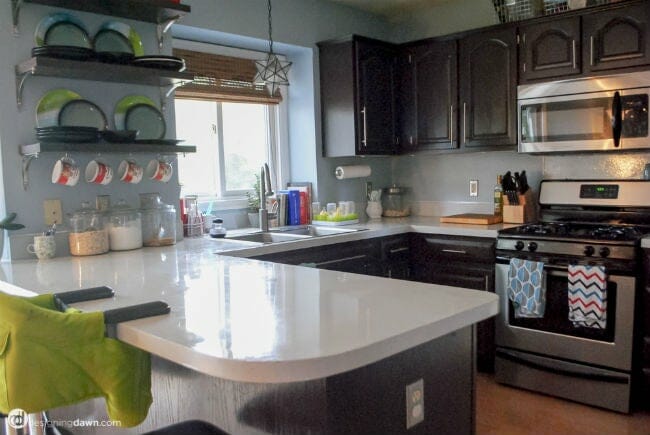
Instead of using a cleaning rag on countertops that are so shiny you can see your cup in them, take a paintbrush! It costs only approximately $120 to give a boring culinary prep station a dazzling, glossy monochromatic paint finish.
Simply follow Designing Dawn’s example; her detailed instructions on Remodelaholic will carefully guide you through every step, from sanding to ensure paint adhesion to sealing for an additional high-gloss appearance.
DIY Paint Laminate Kitchen Countertop
Love the color black? I concur. I wanted to pull up my countertop and do this when I saw this black kitchen countertop. I might finally do it. This counter is gorgeous. Your kitchen will physically change as a result. This DIY kitchen countertop was created using paint and other materials.
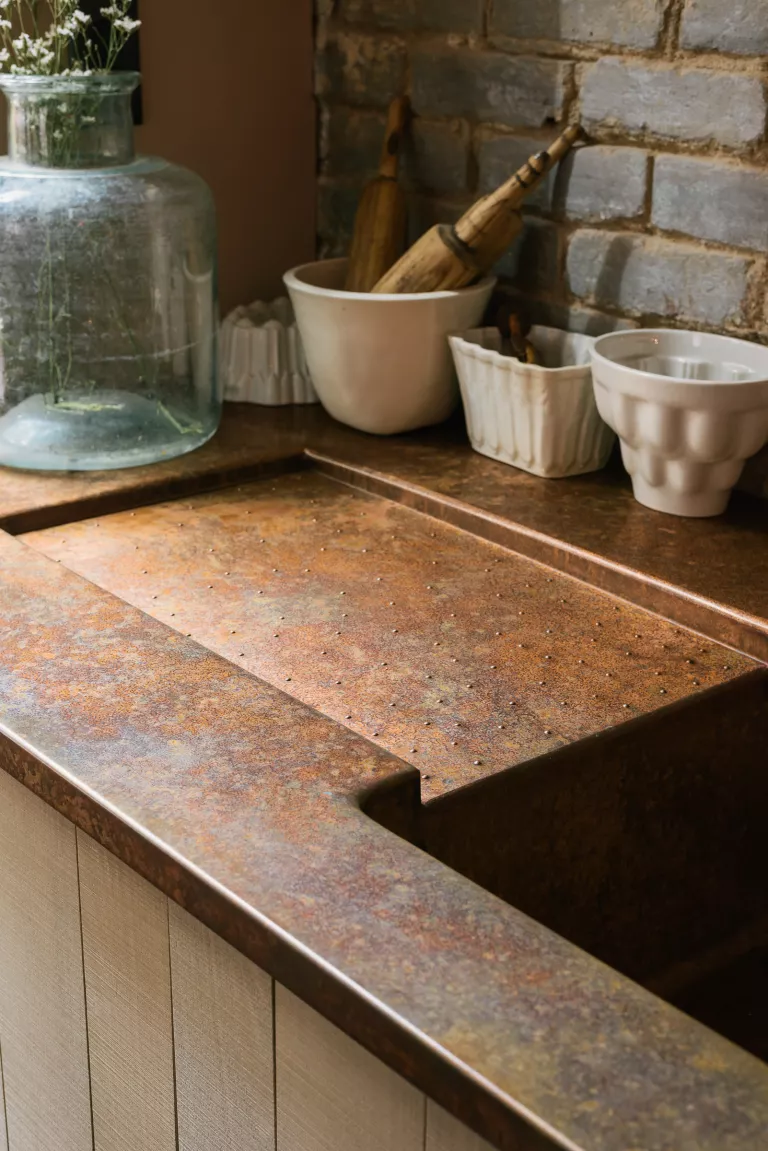
Wrap With Metal Sheets
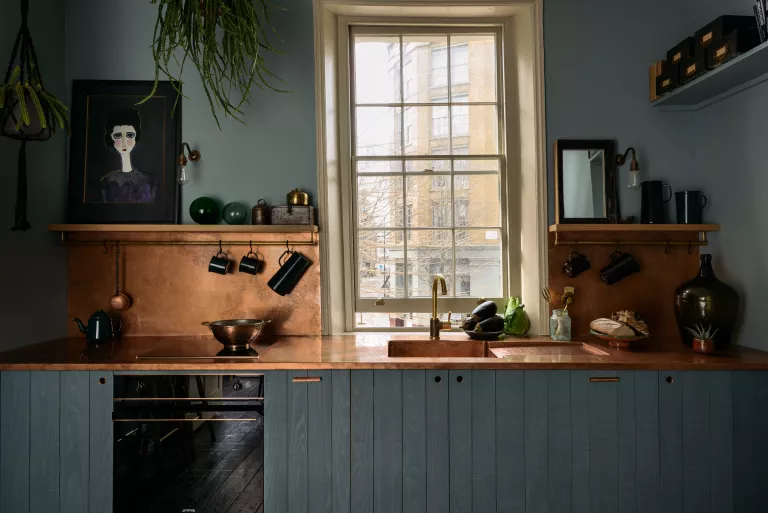
A metal-wrapped countertop is the ideal choice for you if you adore the industrial style. Copper is bright and has a patina that is highly fluid and ever-changing. Hammered copper in particular looks fantastic. What a unique product it has become—so glitzily stylish and little boho.
Some worktops have all the luck; who would have thought that one material could have so many advantages while still being so attractive? says Helen Parker, deVOL’s creative director (opens in new tab). For a consistent aesthetic in your kitchen, if you’re putting a copper sheet, think about including a copper sink as well.
Measure the countertop, write down the measurements, then order the manufacturer’s pre-cut sheet metal. You may get a bespoke measure from brands that is made just for your needs.
The supplied sheet is often already polished, buffed, and installation-ready. You simply need to roll contact cement or epoxy glue on the countertop to install these typically like laminates or tiles. A roller should be used to thoroughly press the metal sheet down once it has been pressed into position. Make sure the metal layer is applied to the corners and edges of the surface and that all air bubbles have been pushed out.
A metal sheet won’t often stick if left to cure on its own unless it is heavily packed down. Sandbags or large crates can be used for the task. Ideal weight is anything over 25 pounds. To distribute the weight, these should be positioned evenly across the surface.
