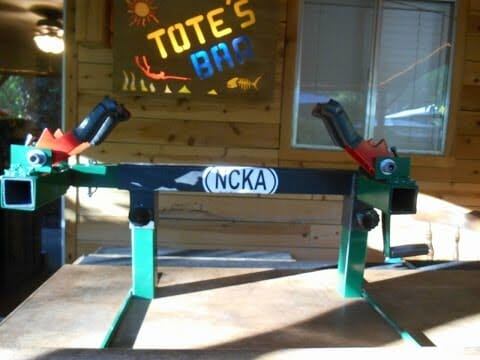
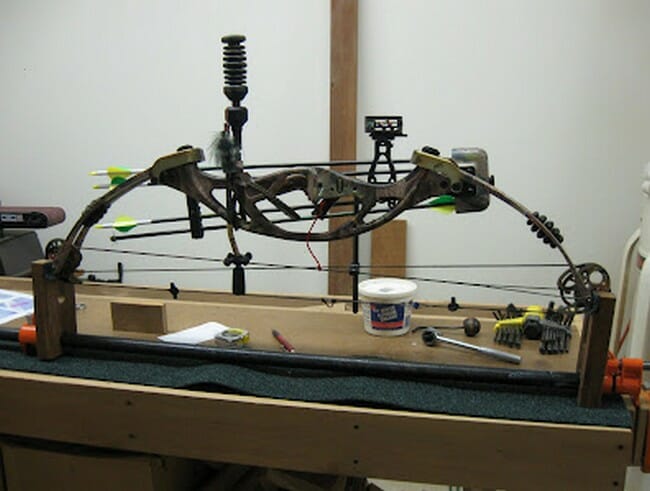
The greatest mechanical bow maintenance tool is one of these Do It Yourself Bow Press Projects. It is constructed of stainless steel and can exert more than 150 pounds of strain on bow limbs and staves. With this bow press, you may easily do numerous different types of string maintenance, as well as the removal and installation of stabs, aim, and limb pockets on your own.
This article will give you with some helpful information on how to create your own bow press using just ordinary household items, whether you need to replace a damaged bow or simply want to save money by forgoing the expense of buying one.
The DIY Bow Press Projects are designed to provide you quick, simple directions for creating your own tiller bow press. You may repair/reflex your existing bows or tiller new bows with the aid of this tiller bow press. Additionally, this bow press includes a special pivoting lever that will make utilizing the instrument a delight. A fantastic method to begin in the world of archery is to make your own bow press to press your bow and construct your own longbow.
DIY Bow Press
This is a metal bow press, meaning that every component is made of metal. It is quite resilient and strong, but if you don’t handle it properly, you can run into problems later. This offers errors that are simple to prevent.
A solid plan is the first step. The fingers are the most challenging aspect of building this bow press. If you happen to have a CNC machine, it may help you avoid a lot of problems. Cut and bend a piece of metal before welding it. You must first create a plywood template.
How To Make A Cheap Bow Press
It is quite simple to construct a good bow press. You can create your own in about ten minutes with just two sticks, one PVC pipe, and several bits of wood. Smaller bows that weigh less than 60 pounds will benefit from this.
Keep in mind that the base for the stick that rests against the tree, tree limb, or whatever object you are using to hold down your stave is one of the simpler components of the bow press. It could be wiser to invest in a quality archery press rather than constructing your own if you need to make a bow press for heavier bows.
$10 Bow Press
The finest bow press is easy to operate, reasonably priced, and productive. So, if you’re considering purchasing everything in one package, this is the one for you. This bow press may be obtained for a very low price and is functional.
You need not worry about the cost because the materials are reasonable because you will still receive value for your money. With its small size and the pressure it applies to the bow, this can fulfill its role and provide the required results.
How To Build A Bow Press
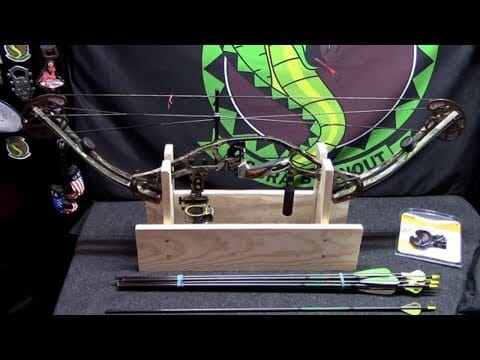
This bow rack is constructed of wood with good finishing and is intended to be used with a portable press. For your bow press to remain in good condition, you will need to take a few measurements and sand it.
Cutting off the area where the bow will rest is the first stage in this process. There will be some measuring required. Additionally, you will need to cut out some side flaps and a seat for the bow to sit comfortably on.
You must correctly assemble the bow frame after you receive it. Cut off after marking out the center from the support arms. The carpet installation, finishing, and bow setting are the following steps.
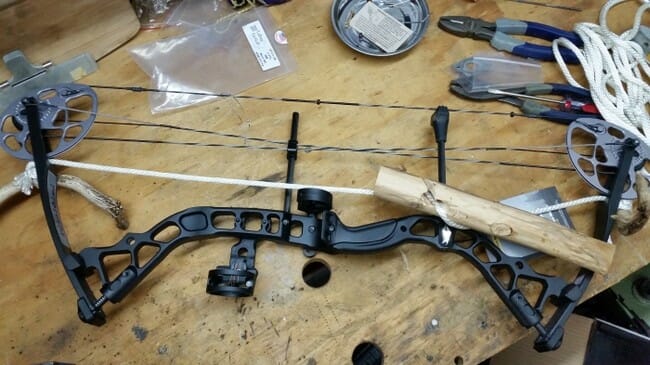
DIY Bow Press For $25
This wooden bow press should cost no more than $25. To do this task, you will need a pipe clamp, black pipe, oak, strong glue, carpet, and wood screws.
It’s simple to enhance your draw weight and speed with the DIY Bow Press. Install a plunger, a press head, and a rod-shaped stapler around your bow while it is mounted in a woodworking vise. The bottom of the plunger has a hole bored into it through which the string passes.
Until you draw or lose your bowstring, hold the string with the press head and pull or push with the staple. Please feel free to refer to the project’s video instructions if you need assistance. In really, putting these components together is half the fun!
It is initially necessary to cut the arms if you are building your own bow press. Obtain the proper size for each. After that, make holes in both of them. You should drill the holes bigger if they aren’t broad enough. Spray-paint them with varnish or rust-proof paint before putting them together.
To ensure it is not rigid, lay the leverage on the mat board and fasten the bow press to it with screws or nails. Making a DIY bow press is simple. It works great with several bows since you can build one at a time. The greatest hand-made bow press available is this one. Your bow will be properly supported against the legs, raised upright.
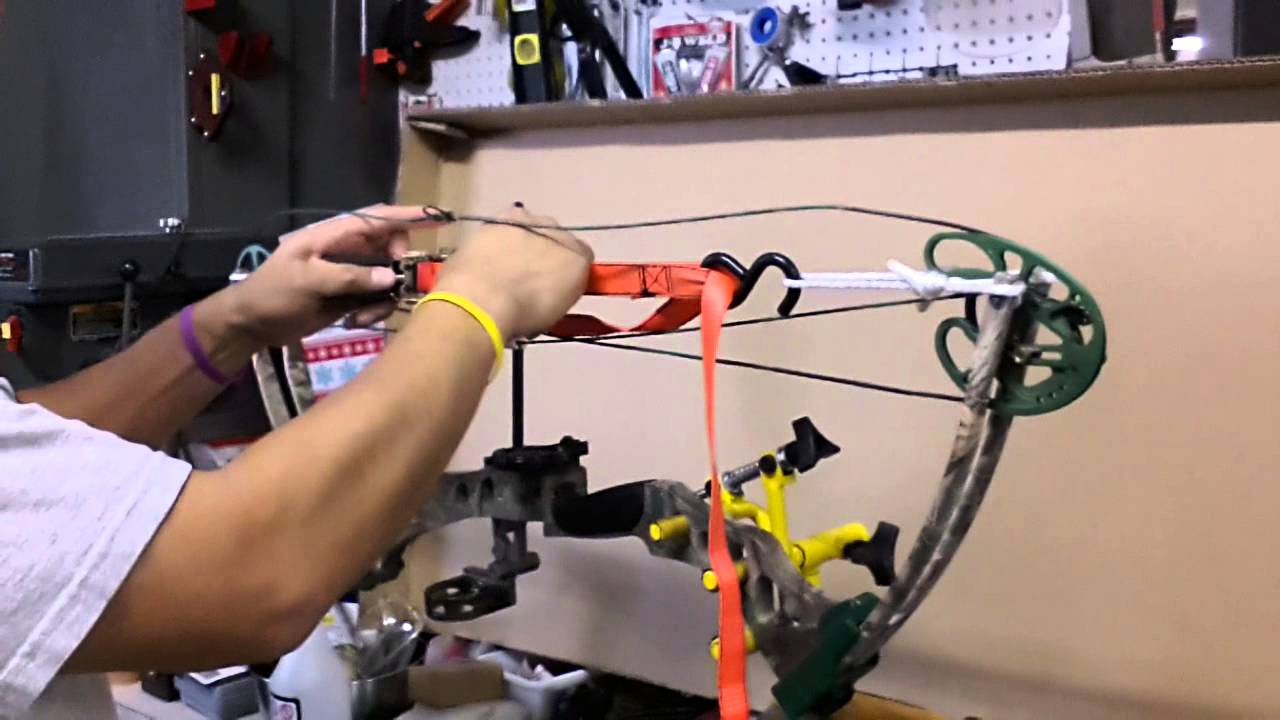
$35 Bow Press Build
If you want a bow press but don’t want to spend a lot of money on one, you can make one for $35. Build this wooden bow press if you want to save money and still obtain a strong bow press that you can use for both your bow and the bows of your friends.
This is designed to be adaptable and may be used with various bows. The bolt from Home Depot, the threaded rod, the wing nut, the washers, the nut, the closed-end wrench, and the weld are the components needed for this.
DIY Bow Press
Making a bow press may be rather simple, especially if it is made of wood and you are confident in your ability to work with it. For this project, you may utilize scrap wood rather of going on the quest for it.
Set up the wood you’ll be using and cut out the parts you need. In order to provide a balance for the bow, the piece’s edge will be slightly pushed away from the edge. If you want more balance, you can opt to divide the wood in half. For a secure fit, don’t forget to drill some holes in the center of the edges.
DIY Bow Press

Making your own bow press is straightforward and uncomplicated. The only supplies required are a screw or nail and some scrap timber. The bowstring is pulled against the plunger and fastened to a hook fitted into the horizontal board to operate this press.
This design may be altered to suit your needs and the materials available, for as by including a shelf for storing arrows behind the press. Please refrain from exerting more force than 30 pounds without first making sure that both bow limbs are bending equally since the bow press does not compress the bow limbs equally.
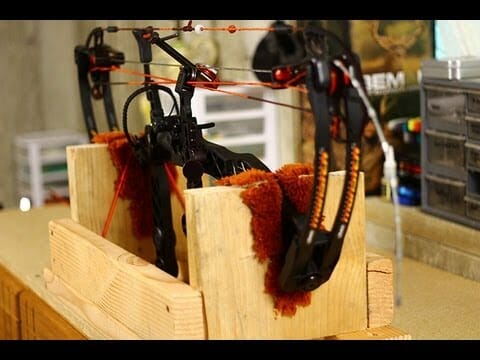
DIY Garage Bow Mechanic
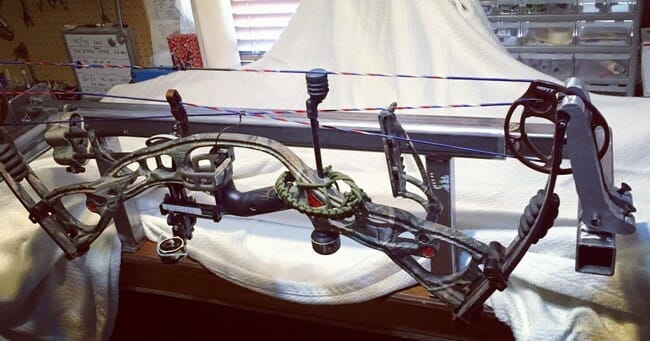
Although it may be your most expensive purchase, the garage bow enthusiast really needs it. You want a press that can securely collapse whatever bow you’re working on because there are many various limb and riser designs available on the market. Last Chance’s EZ Deluxe Press ($780) is my go-to.
It takes no engineering expertise to operate the press, and it is simple to set up. The press is simple to install to a wall or bench, and a lever in the center of the main bar allows you to rapidly swivel a bow from a vertical to a horizontal position. I also applaud the flexible, unique LCA finger device.
Fingers may be readily moved left and right to accommodate for limb width by depressing small tabs, and small circular discs separately move each finger forward and back. This implies that when pushing the bow, you never put undue strain on the limbs or add excessive torque to the riser. From axle to axle, this press can bend bows of 25 to 40 inches.
DIY Easy Bow Press
Our Easy Bow Press will let you make flawless, expert-looking bows at home. made with a stapler, which is a common household item! It is also simple to use. Simply place the Bow Press on top of the stapled ribbon and fasten it with your sewing machine’s presser foot. Due to their intricate sculpture, the bow’s petals have a lovely aerodynamic curvature.
The DIY Easy Bow Press really very simple. However, we thought it would be very wonderful to just put the quality and precision of our press into a package that takes out all of the guessing. This tool has been around for years, and we can help you construct one. We made the bow press extremely foolproof to use while yet maintaining its strength and accuracy. We appreciate you doing your bit by carefully following the instructions and only using the archery equipment as directed.
