
Remember that finding simple nail patterns to duplicate at home is not as simple as Pinterest and YouTube instructions would have you believe. The typical individual has undoubtedly struggled at least once to apply a single shade of polish without smearing it all over their cuticles or to free-hand any kind of nail art design. And that’s a real disappointment if you really enjoy having ornate nails. We like going to the nail salon just as much as the next person, but even a monthly manicure with nail art can be rather expensive for most individuals.
Although it may seem nearly difficult to paint your own nails at home, there are some nail styles that practically everyone can master (see what we did there? without extensive training and expertise. In light of this, we decided to compile a list of the simplest nail designs ever created by searching the Internet. Scroll down to see a wealth of simple nail designs that will make the idea of doing nail art at home feel a lot less intimidating.
Wavy Red Easy Nail Design
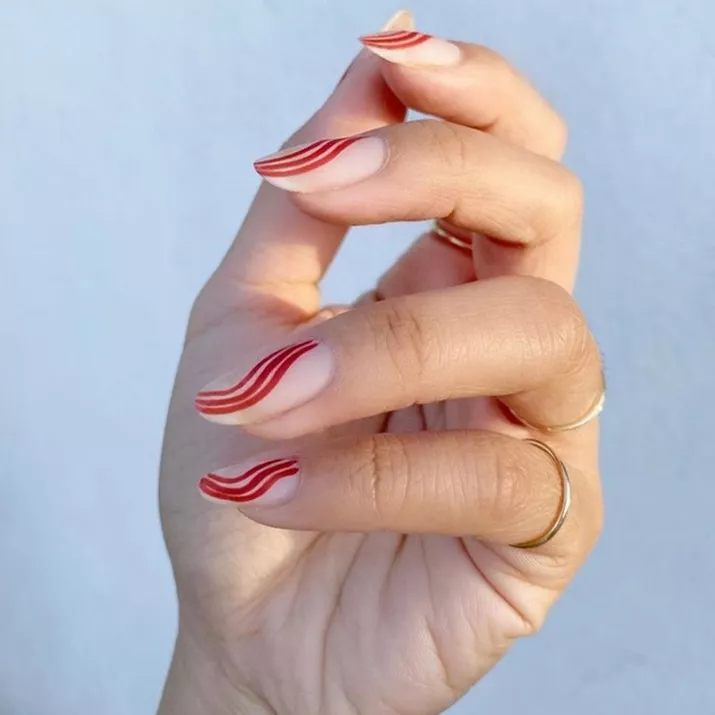
According to Meade, this appearance requires “little work but maximal design.” This abstract line design creates a straightforward yet seductive impression, similar to painting on your nails. Meade gives the next advice: “Using a mild polish, apply a thin base layer, and let it dry for 60 seconds. Use your preferred color and a fine detail brush to create a series of sporadic, free-form swirls with varying thickness. Remember that art is imperfect and subjective.”
Daisy Easy Nail Design
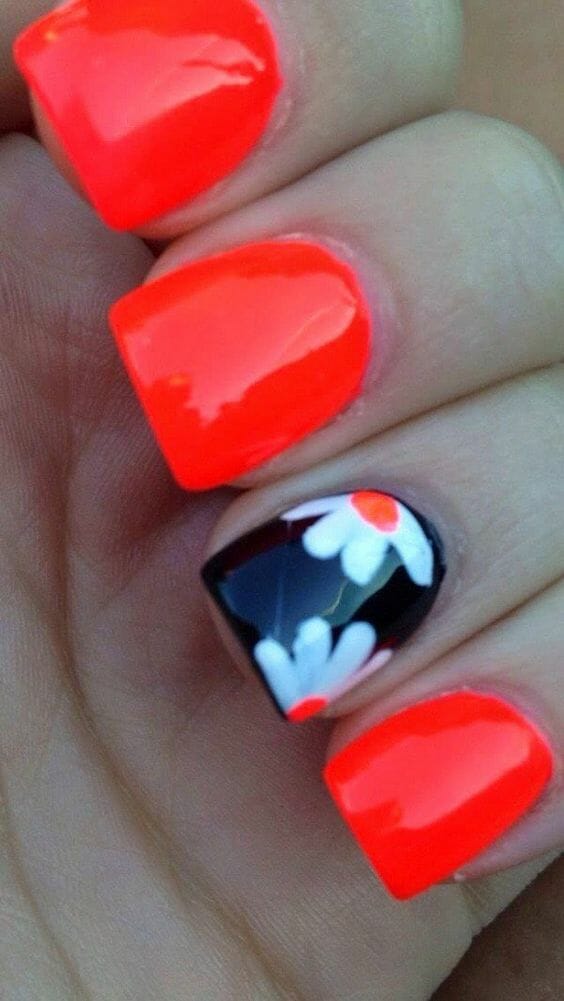
Although it requires a little more dexterity than hearts or polka dots, applying a half-daisy nail design on the border of your manicure is still very possible.
Once more, begin with polka dots. To make the petals of the flower, place four tiny dots close to the edge of your nail. Draw the dots together at the edge of your nail by extending them downward. When the polish has dried, draw a polka dot in a complementary color directly at the edge of your nail to serve as the flower’s center.
Delightful Dots Easy Nail Design
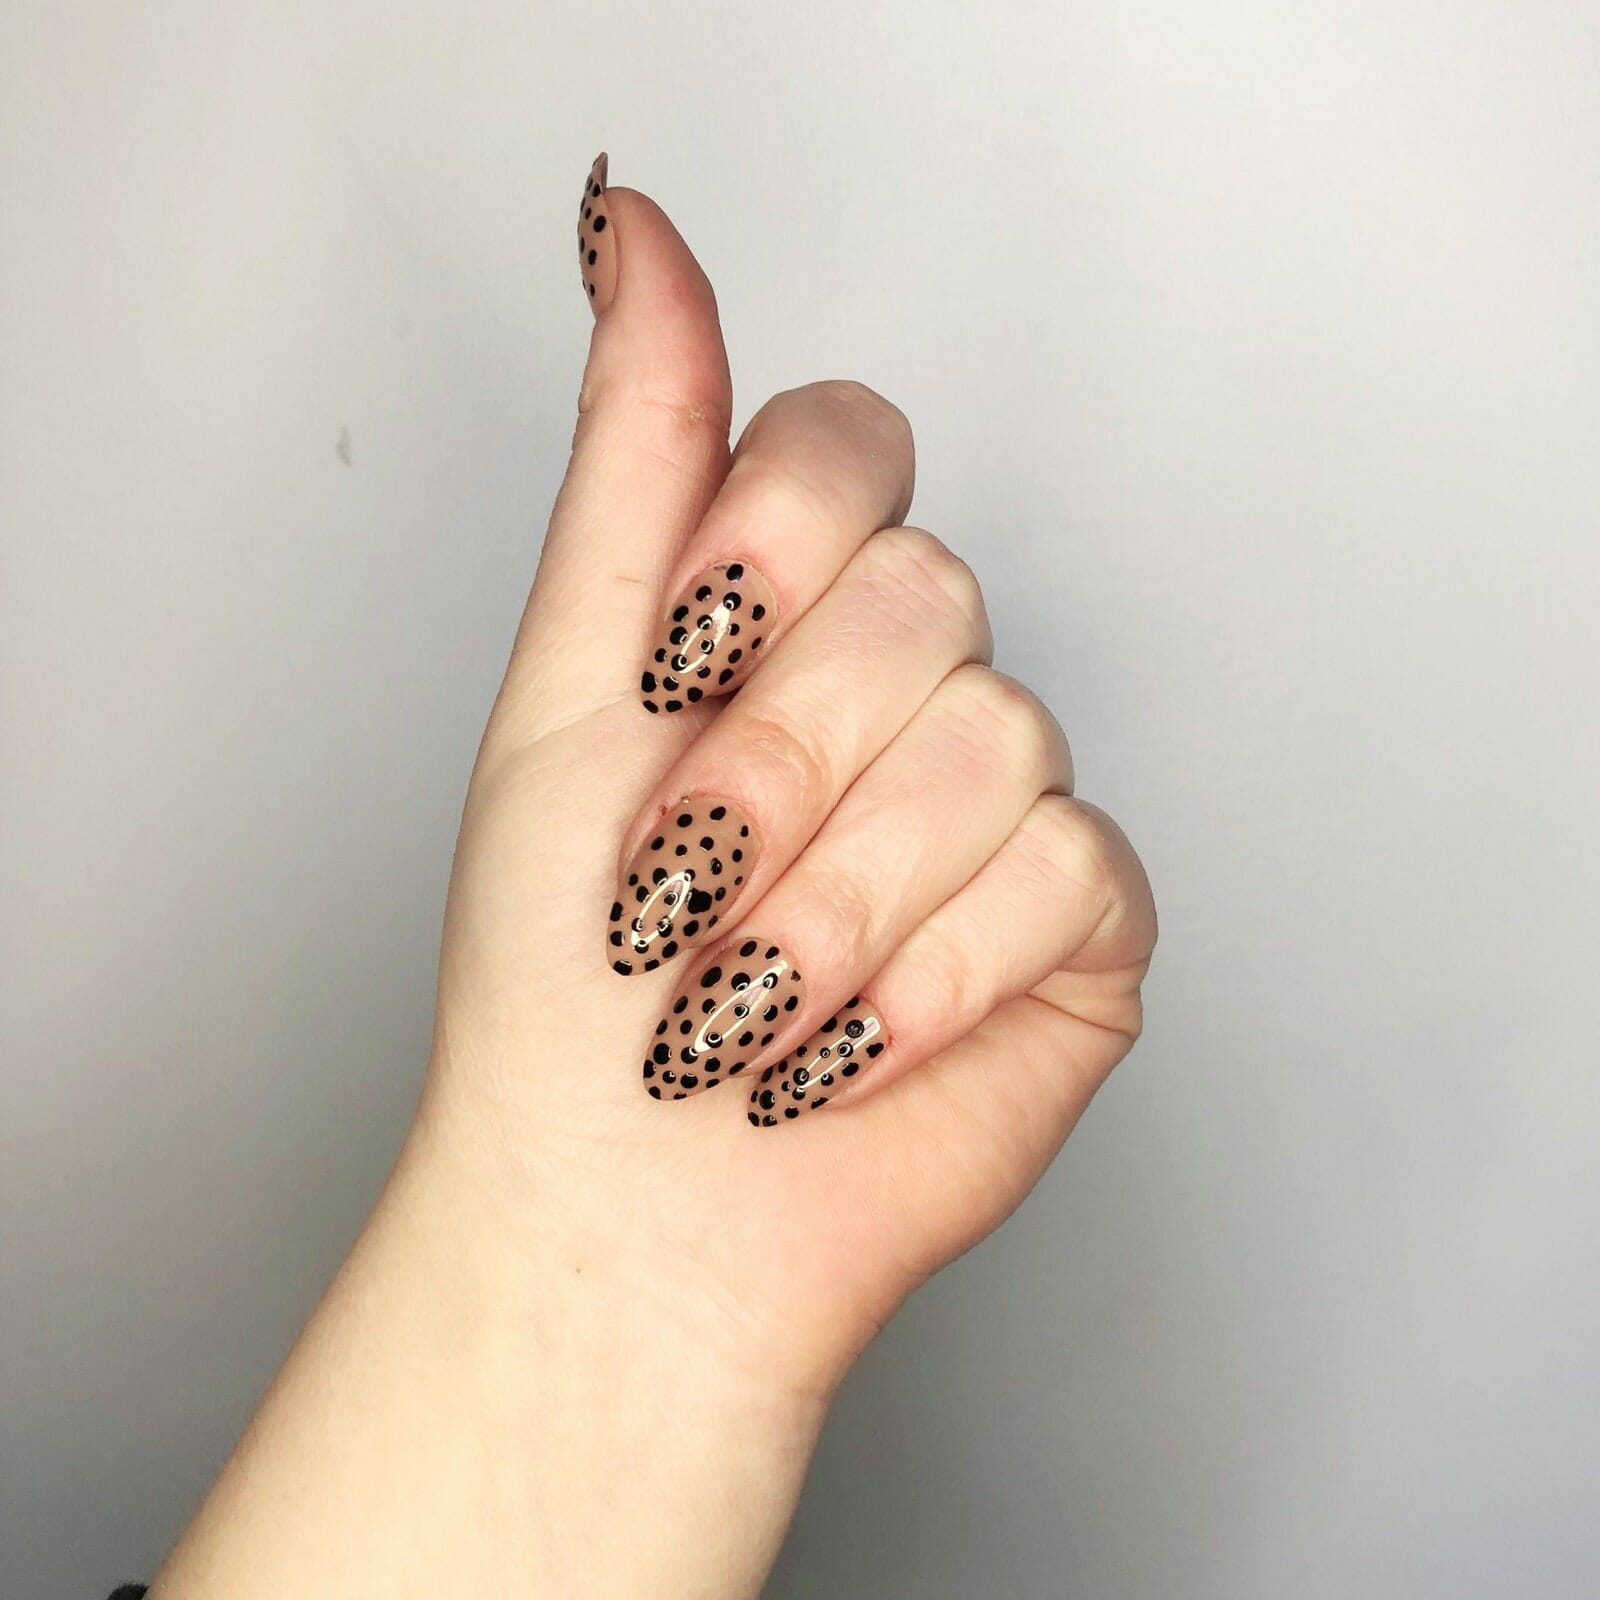
Every time you remove a bobby pin from your hair, there’s a strong possibility you’ll leave it on the bathroom counter, where it will likely fall to the floor and be lost forever. Instead, use it as a makeshift tool for dotting nail paint by pulling its two prongs as far apart as you can.
You may lightly coat one of its beaded ends with nail paint by dipping it into the bottle, then use it to apply polish to your nails dot by dot. In the image above, Allure news writer Nicola Dall’Asen demonstrated how to accomplish it with a set of artificial almond-shaped nails from Static Nails and Licorice Essie Neutrals Nail Polish.
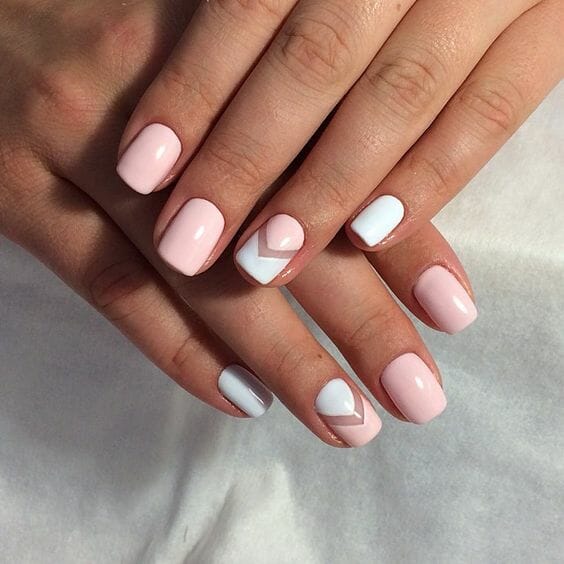
White Stripe Easy Nail Design
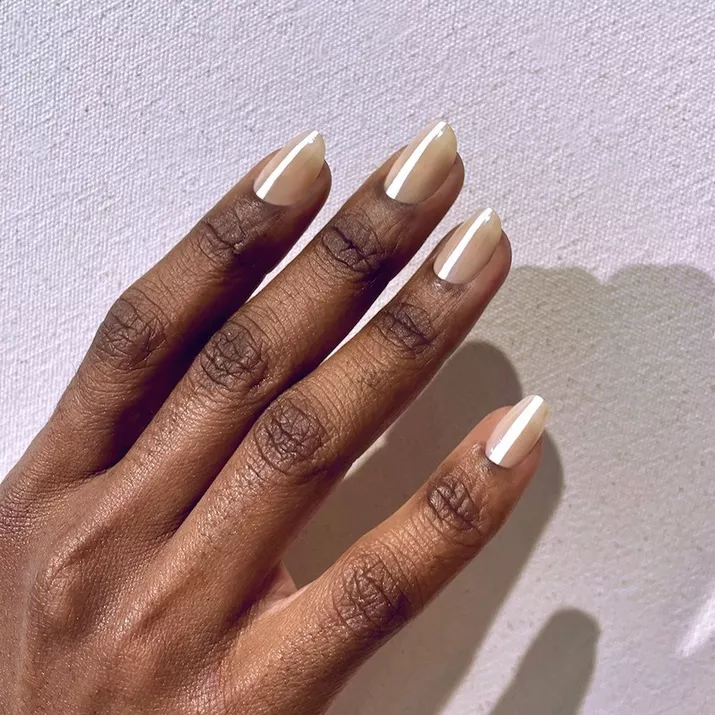
Less is more in this situation. These simple, neutral nails with a tiny white line running down the middle are one of our favorites. Apply one to two coats of any neutral or nude hue as the base, advises Oung. “Once it has dried, draw a beautiful white, thin vertical line over the surface with a striping brush. To keep the pattern in place, use gloss (SpaRitual Nourish Fast Dry Vegan Top Coat, $20).”
Rhinestones Easy Nail Design
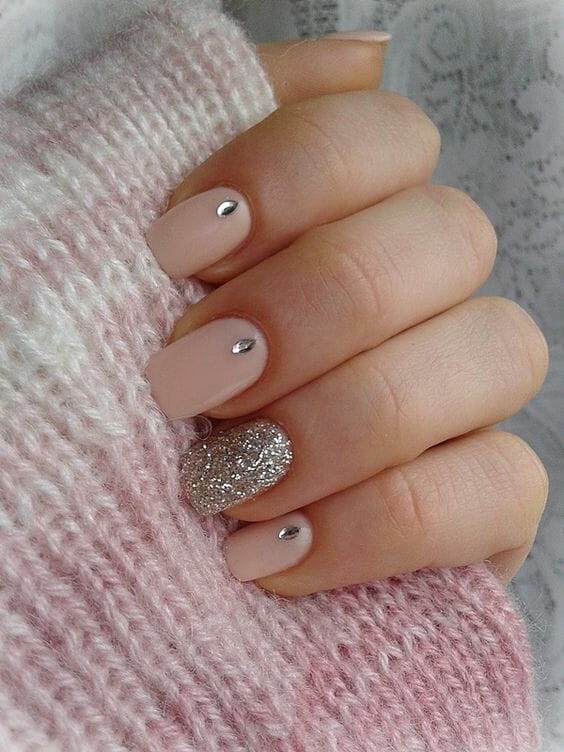
It’s simple to take your manicure to the next level by adding rhinestones to your nails. Any art supply or beauty supply store will sell tiny rhinestones. Simply apply a tiny rhinestone to the base of each nail while your nails are still wet to quickly give your manicure some glitz and refinement.
Wonderful Watercolors Easy Nail Design
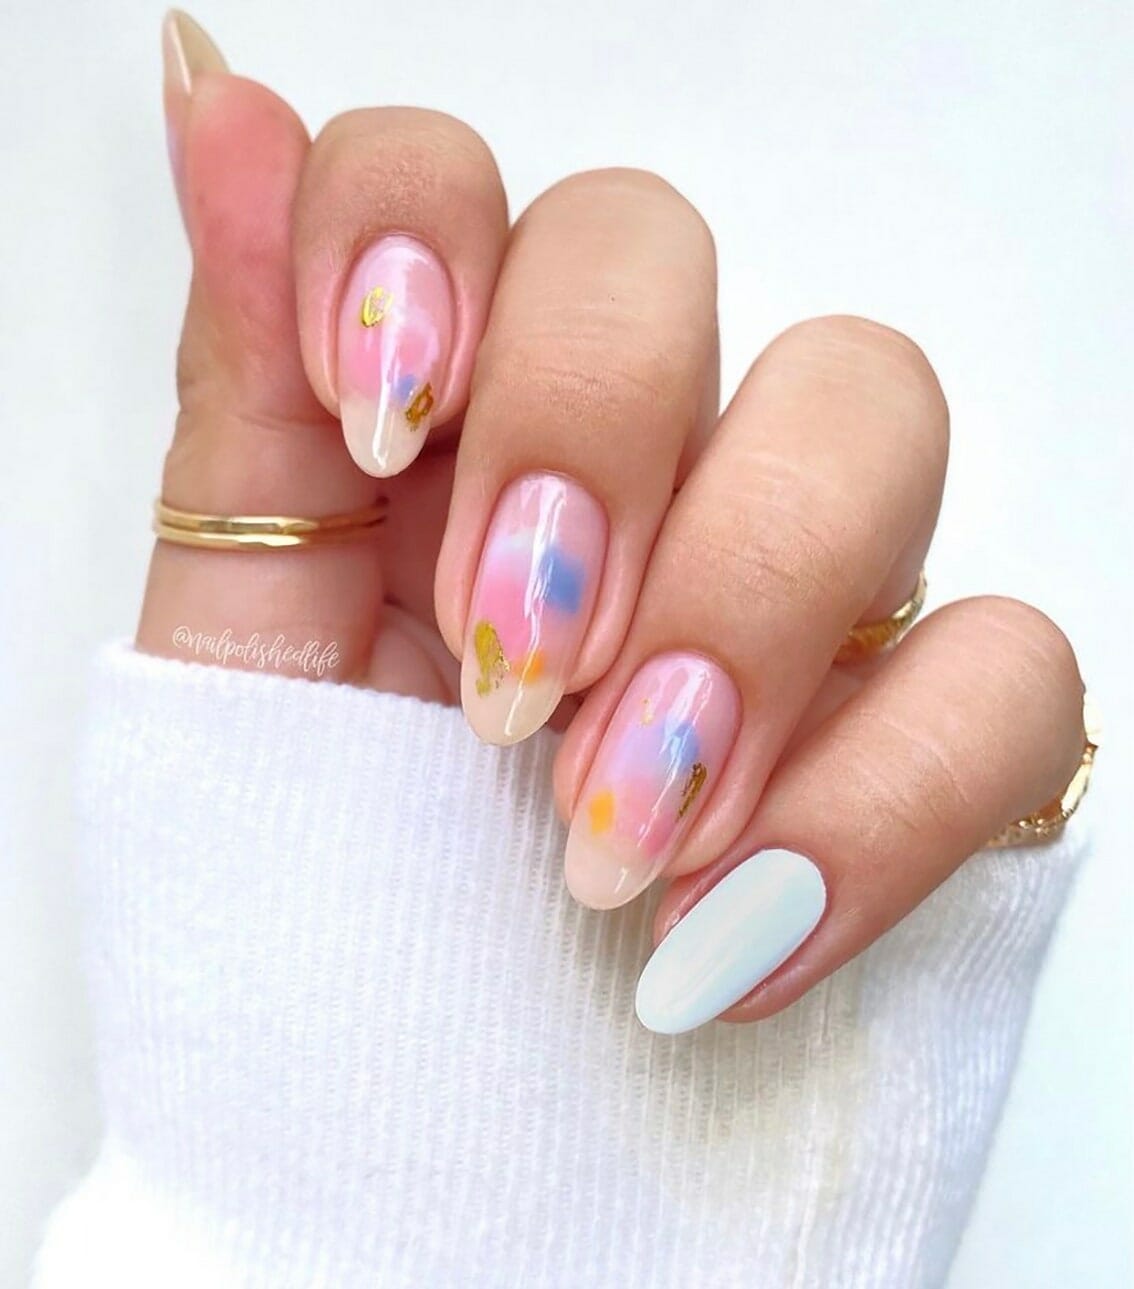
As demonstrated by this lovely manicure by Amy Tan, it is absolutely feasible to make each of your nails into a watercolor masterpiece. Tan explains to Allure that she created the watercolor appearance by combining her color polishes “with a few glob of clear polish and painting[ing] them on loosely.” She advises checking the polishes’ opacity on a piece of paper, though, before applying them to your nails.
To get the look of expensive gold foil on the nails’ gilded highlights, use a gold nail polish and “paint on a few’swooshes’ to complement your mani.” Tan acknowledges using gel polishes for this design, but claims that normal polishes may provide “a comparable appearance” just as well.
Statement Red Easy Nail Design

Who doesn’t adore a traditional red mani? It is elevated to a whole new level by the straightforward star accent on the ring finger. To create stars and many other details you’ll discover in this collection, pick up this 10-Piece Nail Art Brush Set ($9) or any set that’s comparable.
Stripes Easy Nail Design
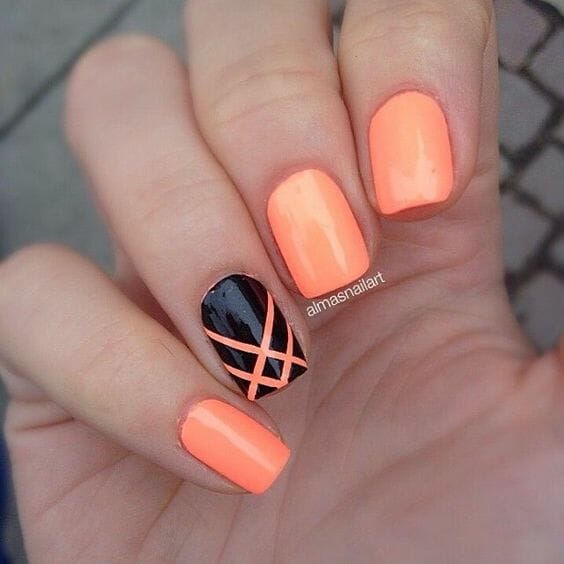
Using thin nail tape, you may make stripes that resemble the crisscrossing lines shown above. This particular brand of tape is intended exclusively for do-it-yourself nail art.
Start by applying a vibrant base color to your nails. After the polish has dry, create your chosen striped design by using the thin nail tape (which you can get online or in any beauty supply store). Paint a new, deeper color over the tape. Peel the tape off gently when the polish has cured to reveal your perfect stripes.
Nifty Neon Tips Easy Nail Design

When your hole-punched paper tore and dropped out of your binder at school, you used to patch it with donut-shaped stickers. It turns out that those little stickies are a really useful nail-art tool for creating these neon tips that are inspired by French manicures. If you are a student or live with one, you could already have some laying around. If not, you may get them for a few dollars at your neighborhood office supply store.
Start with a pair of press-ons in a neutral hue to create these vibrant neon nails. You may definitely use your naked, natural nails as a basis or paint them a different color beforehand. Dall’Asen used ones from Kiss. Lay one sticker across each nail towards the top, then make sure the spacing is uniform before applying two coats of MiniLuxe’s lime-green nail polish to the tips. Although Dall’Asen’s neon-green nail polish is no longer available, KB Shimmer’s Easy Glowing Nail Polish is quite similar. Grab some tweezers and remove the stickers as neatly as you can before the second coat dries.
Shimmering Tips Easy Nail Design
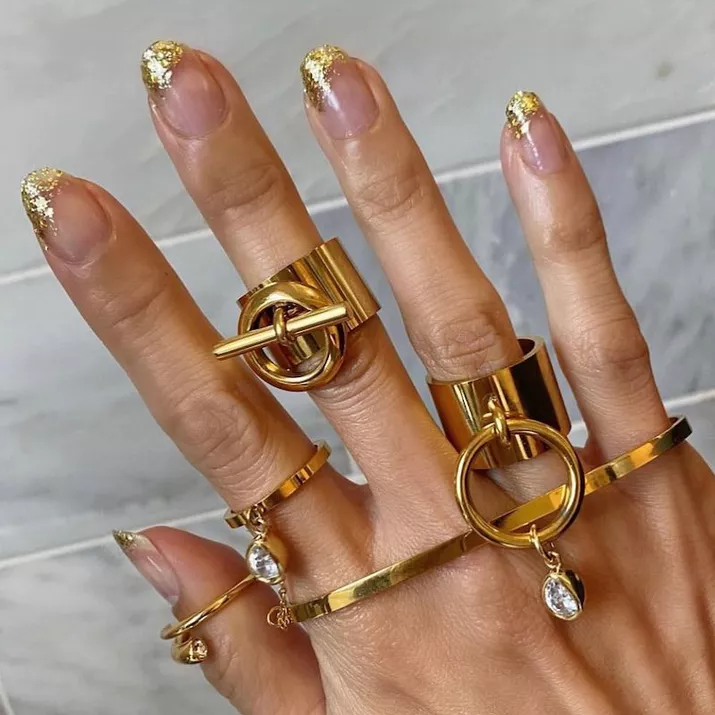
Use a gold polish on the tips to highlight your unpainted nails. Consider a bold metallic color like Gold Dust from L’Oréal’s Colour Riche Nail ($13). Make a strong statement by wearing with gold jewelry.
Cut Outs
Additionally, you may use tiny nail tape to make cutouts in your nails. Prior to applying the tape, avoid using a base polish. Put the thin nail tape in the preferred arrangement. Then, coat the tape with varnish, let it dry, and peel it off to reveal a chic cut out. To give your cut-out nails a flawless sheen throughout, finish them off with a clear top coat.
Random Doodles

As illustrated by nail expert Kate Bonar, the daydreaming sketches you’ve made in the margins of your notebook page can really serve as the basis for your at-home manicure. The best way to apply your drawings to your nails is to use a fine-tipped brush and a “high-pigmented color for the design to ensure it pops,” according to Bonar. She painted the doodles on each nail with Brush H from Nails Luxe. Finally, she stresses the need of making sure the pattern is completely dry before applying topcoat to prevent smudges.
Pastel Mismatch
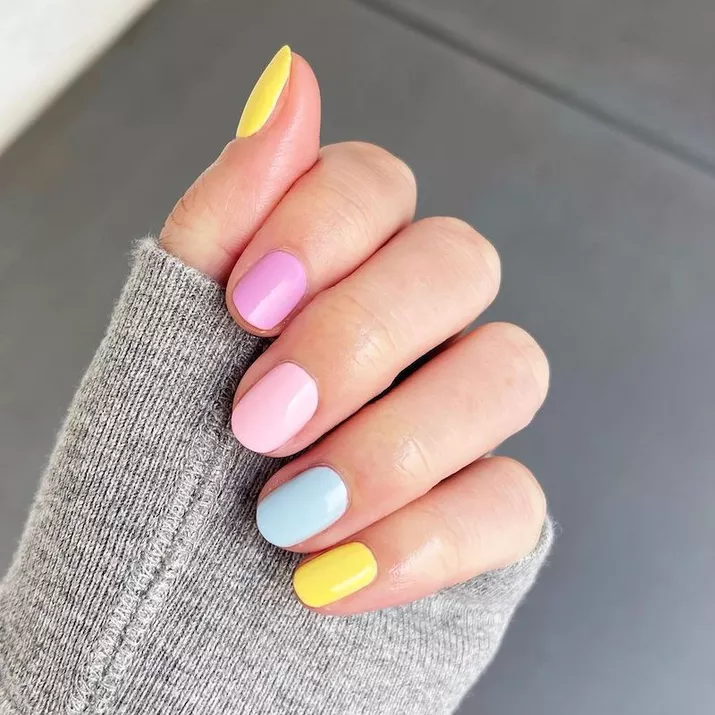
We adore a beautiful pastel nail design, and having several color choices makes it even better. For a polished nail art style that doesn’t demand any difficult accuracy, mirror the color arrangement on each hand.
Paw Prints
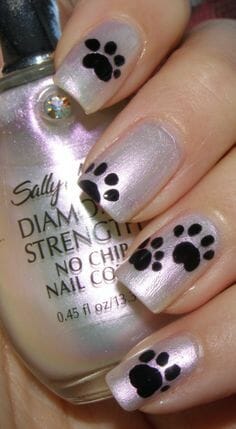
Paw prints are a wonderfully charming pattern to add to your manicure if you adore animals. To create a sweet paw print effect, use the head of a pin once again to add four tiny polka dots on top of two bigger linked polka dots.
Bright Stripes Easy Nail Design

Nothing can’t be improved with a splash of color, right? By emulating the aesthetic that nail artist Nataszija Moore developed, you may give your nails some life. Moore claims that she used an 11-millimeter (or 0.4 inch) brush to create the double-stripe look. Simply said, a very fine brush is necessary for this pattern. Moore advises waiting until the first side is completely dry before beginning the second side after filling in one line with the finish of your choosing. This design demonstrates that improving your at-home manicure skills does not require an intricate pattern.
Starry Details
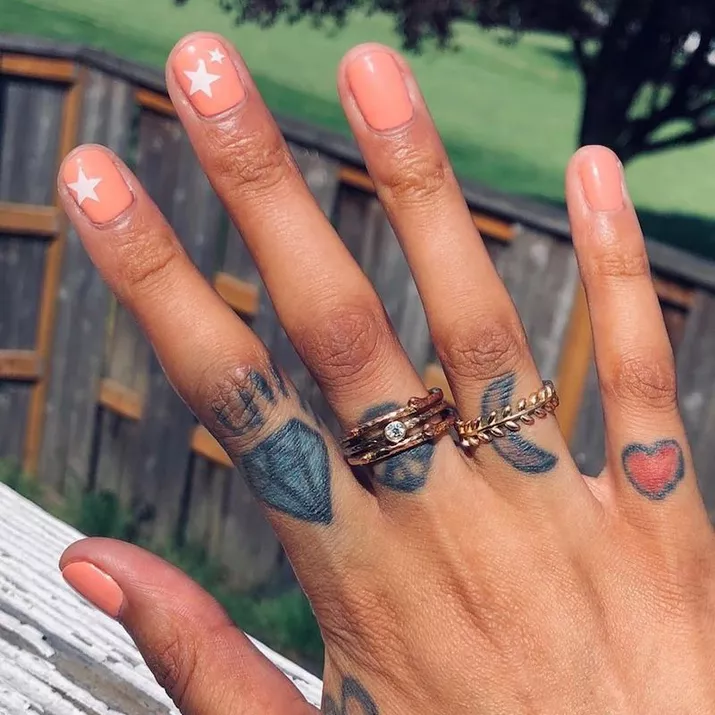
Nail stickers are a great option if you want to rock some nail art but don’t have the steadiest of hands. Olive & June’s Nail Art Stickers ($9) are a fun and simple mani option. We can safely say that we’re impressed.
Accent Nail
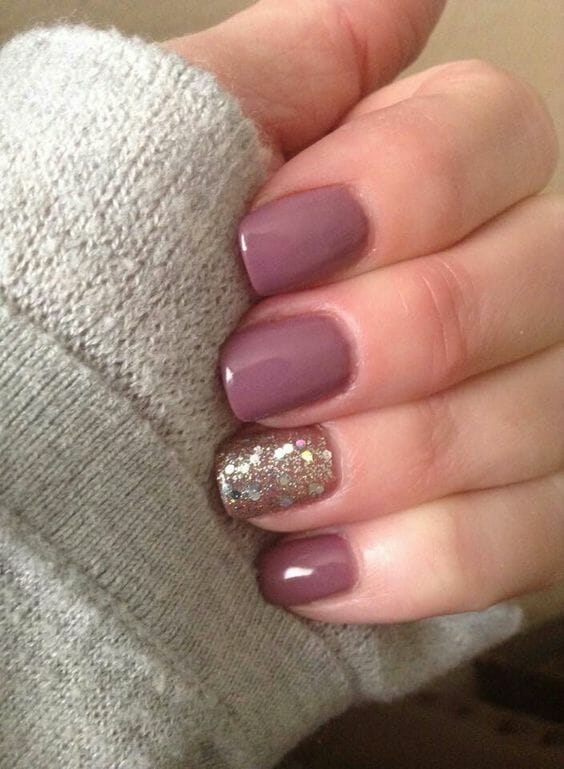
The simplest nail art you can do at home is an accent nail, by far. But it’s also lovely in its own understated yet subtle manner.
Simply apply a single color to all but one of your nails. Maintain a neutral hue, such as the lavender in the example above. Then, paint your one bare nail with a richer, more vivid, or sparkly shade to create an eye-catching accent nail that livens up your manicure.
This article has all the suggestions you need to jazz up your boring manicure or pedicure. Learn about 10 quick nail designs in this article to instantly improve your manicure or pedicure.
Sweet Swirls
You’ve certainly seen abstract swirl nails all over your Instagram feed, but don’t get it twisted (get it?) Reshma Balkaran, a nail artist from New York City, shows that you can really make the pattern on yourself.
Before experimenting with your polish, she advises “[practicing] the design on paper first” and investing in some detailer brushes or short detailer brushes. All the tools you want to perfect those intricate nail art elements are included in the Sally Hansen Salon Pro Nail Tool Kit. The set comes with a striping brush, a marbling and dotting tool, and a detailer brush.
Teal and Gold Easy Nail Design
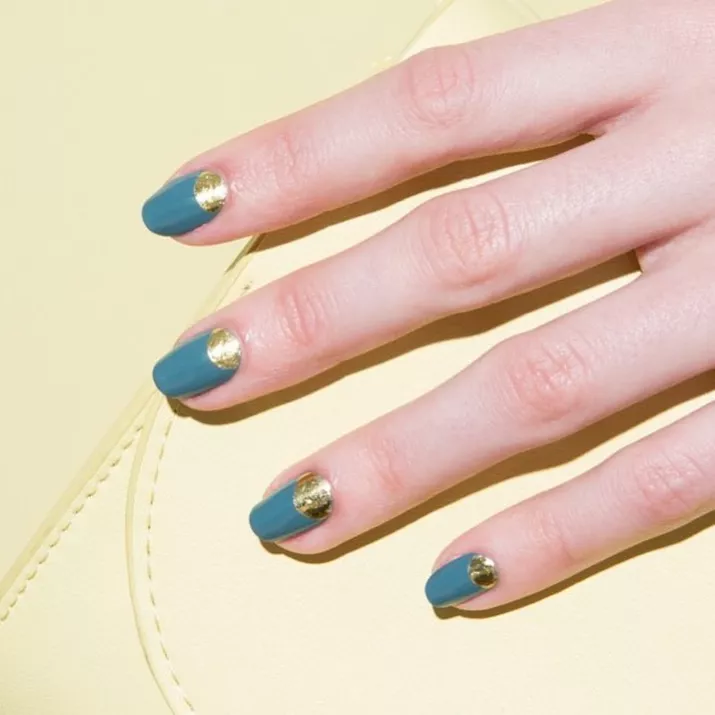
In this stylish pattern, shiny gold and teal clash. Paint two coats of an opaque teal paint, advises Oung, to reproduce the look. Try Essie Go Overboard ($15), a color. “Once it has dried, paint a half-moon with a metallic hue around the cuticle region using a long detailer brush. Start by placing a tiny metallic dot in the center (the moon’s base) and two smaller dots on either side of its end (the moon’s “smile”). Fill in the remaining portions of the moon after joining the dots with the detailer brush. Permit to dry. Apply [a top coat that dries quickly] to seal the pattern.”
Gothic Goodness
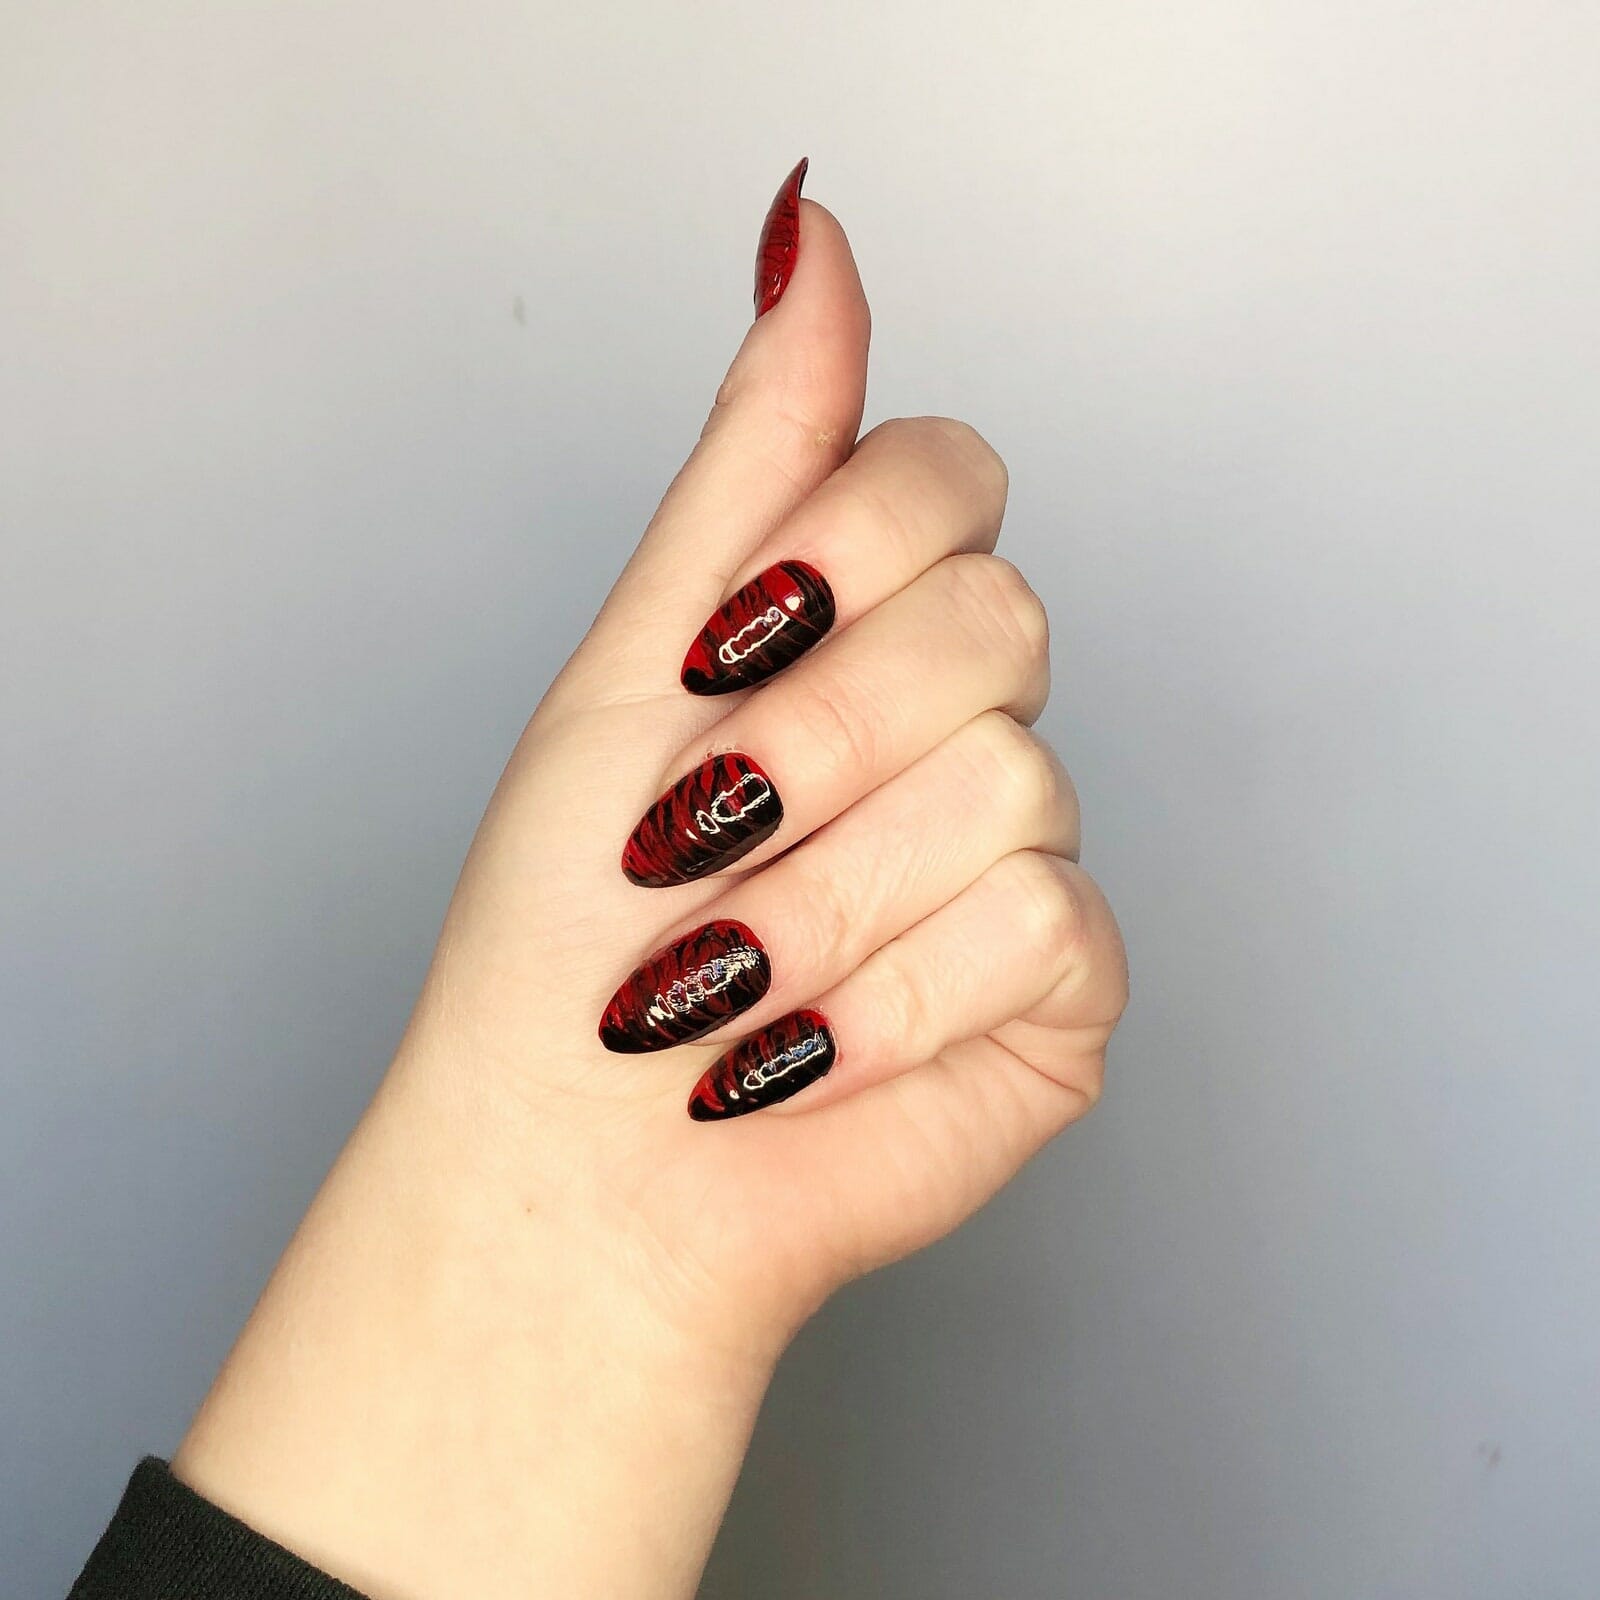
Things start to get a little messy but really entertaining at this point. There are countless ways to create a marbled pattern, like the one Dall’Asen did above with OPI’s Big Apple Red and Black Onyx. All you need is a toothpick and any mix of nail colors. It just took three steps to get this insanely gothic look: Apply thick coats of red and black varnish to opposite sides of the nail, and then drag the tip of a toothpick back and forth through the polish until it becomes deformed together.
Canary Yellow Easy Nail Design
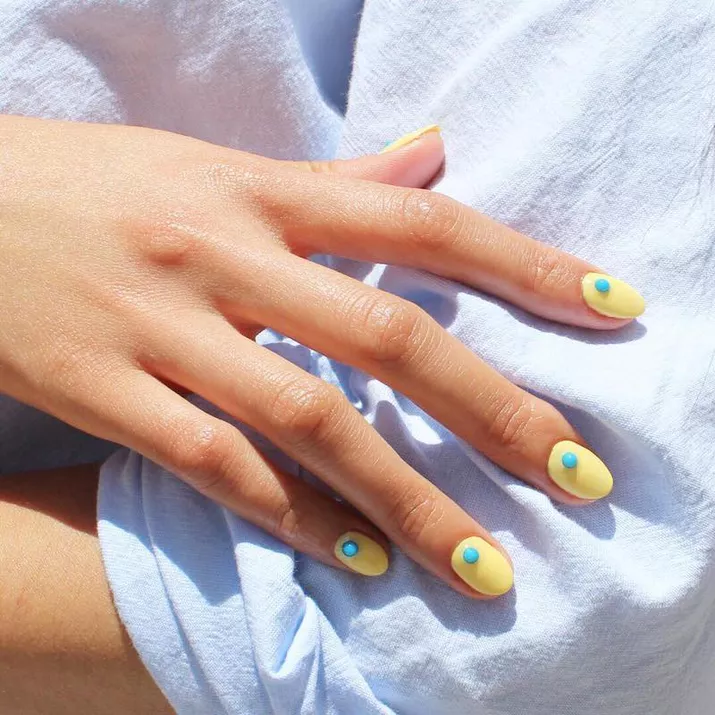
This Paintbox style stands out thanks to the contrast between the yellow foundation and the blue dots. These dots are 3D, but if you don’t want to buy any more jewelry, a contrasting polish will still make a strong statement.
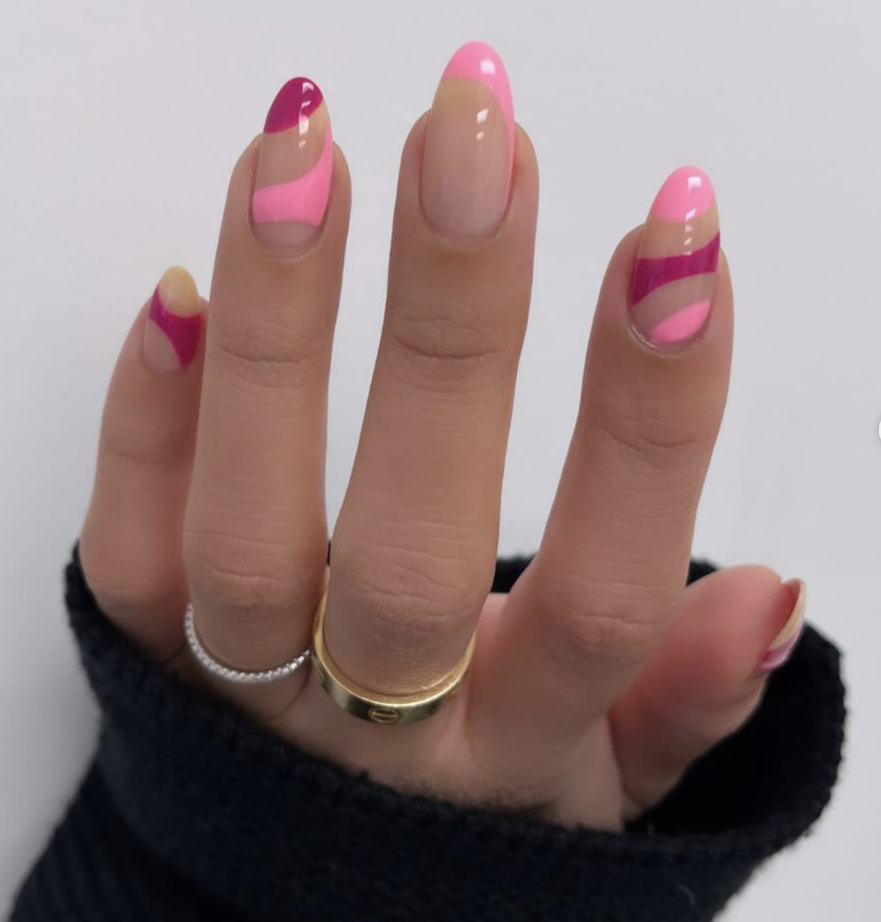
Side-by-Side Shapes
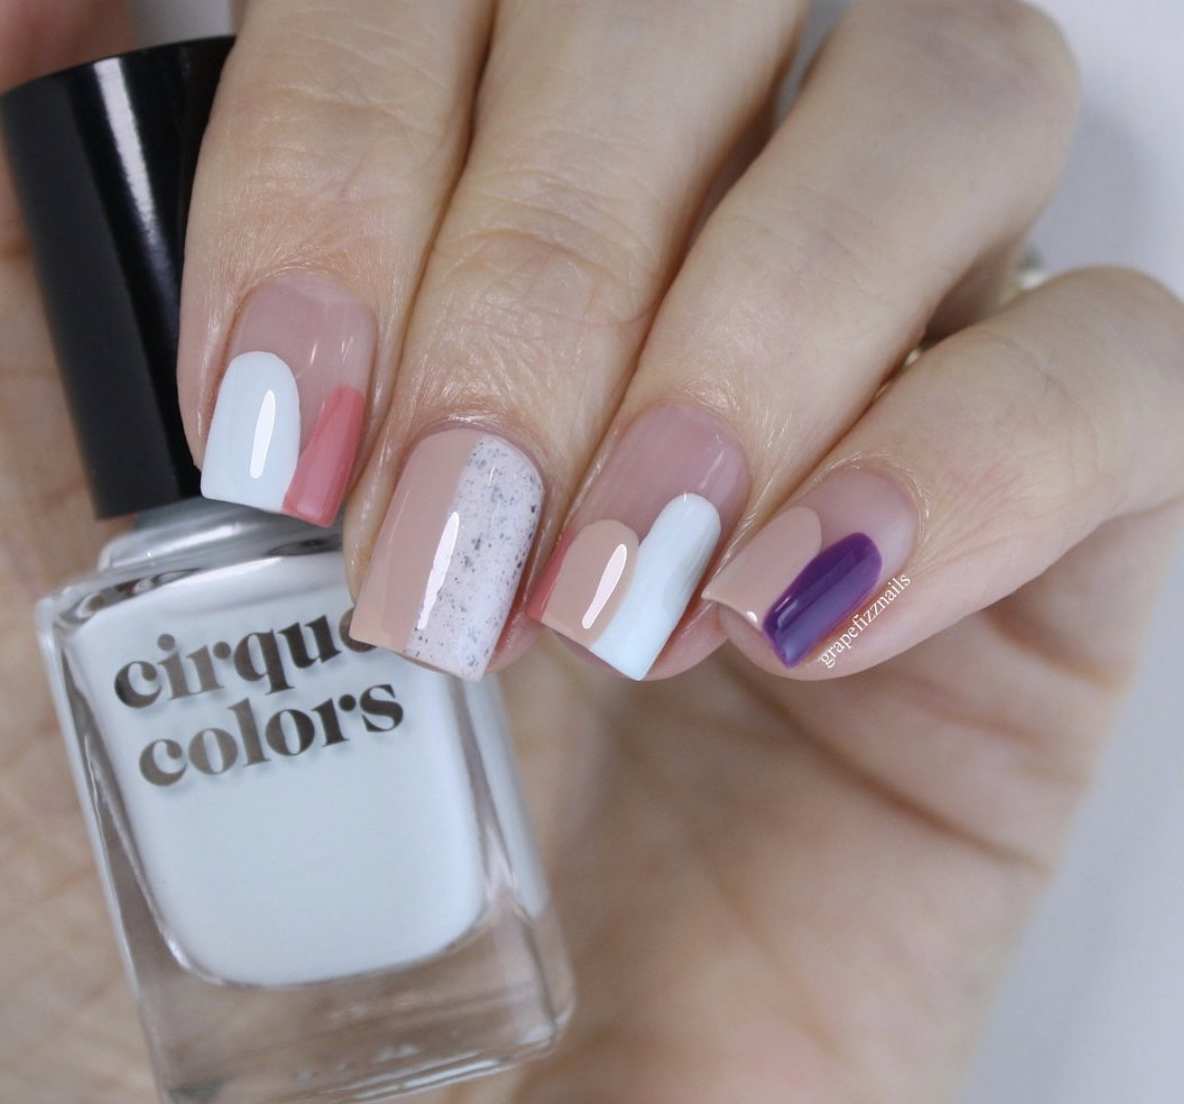
A nail design that is abstract is always a good choice. The manicure seen above was made by Anne Thompson, who affirms that “it’s one of the quickest manicures to produce.” The method of creating abstract nail art, according to Thompson, “is choosing colors that will compliment each other and create a striking statement.”
She tells Allure that she employs “two mild hues, a bright color, and a dark shade” for this abstract pattern. When Thompson has gathered all the necessary hues, she “swipes the polish on haphazardly.” She remarks, “I adore how each nail ends out unique.
Two-Tone Purple
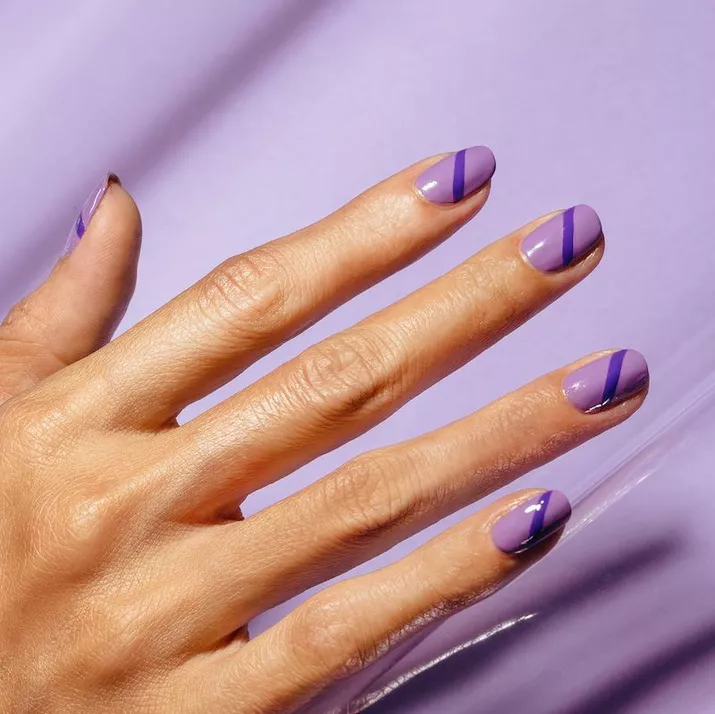
Here, purple on purple works perfectly. A clean, modest approach to nail art is always best achieved by using many tones of the same color. Try OPI Do You Lilac It Infinite Shine 2 Long-Sear Lacquer ($13). as the foundation and A Great Fig World from Nature Strong Natural Original Lacquer ($12) for the stripe.
Gorgeous Glitter Easy Nail Design
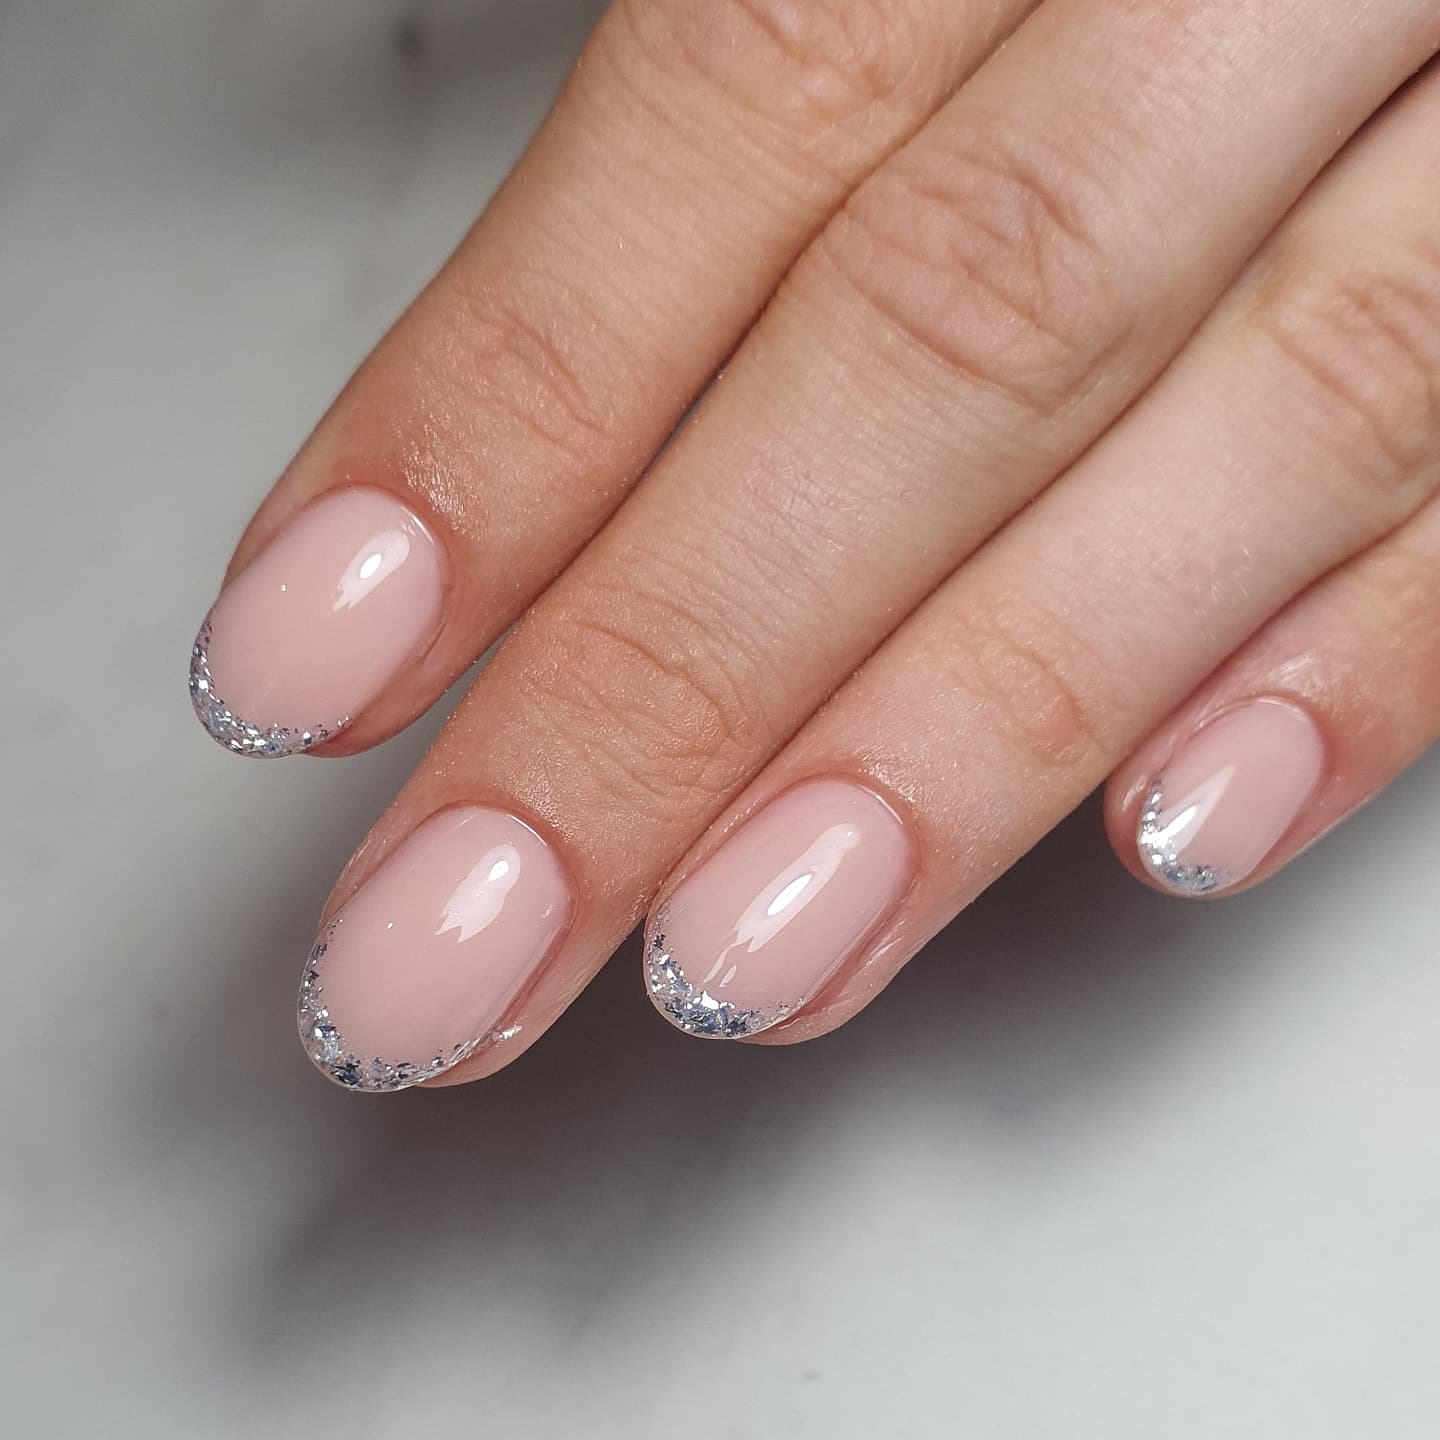
Glitter is something that really stunning females love to wear, therefore you should follow some advice from nail artist Jamie Didlock. Didlock advises that you will need your favorite neutral color and a glitter nail polish (we recommend the Best of Beauty award-winning Butter London Patent Shine 10x Nail Lacquer in All You Need Is Love).
Didlock advises using any of the following to fashion the crescent-shaped glitter tips that are the centerpiece of the French manicure: a dotting tool, a cheap fine nail art brush, an ultra-fine eyeliner brush, and even a brown wooden stick.
