One of the most anticipated and exciting seasons of the year is the fall and Halloween season. The highlights of the season are, most obviously, the entertaining DIY Halloween decorations and parties. Here is a list of the greatest and most simple Halloween pumpkin carving ideas that you will like.
These creative pumpkin cutting ideas exude the ideal autumnal sensations thanks to their color schemes as well as the enjoyable family Halloween crafts. Who wouldn’t want such incredible and lovely décor in their home, really?
The variety and numerous ways you may customize the carved pumpkin design, though, are what make it so thrilling. Everything may be changed based on your preferences or those of your children, including the colors, patterns, and sizes. So let’s look at the top pumpkin carving ideas we’ve listed for you below!
Ghostface Pumpkin Design
If you’ve ever enjoyed slasher horror films, chances are you’ve watched Scream, which has since become a staple of the subgenre. If you haven’t watched it and still know the mask, you may have seen it in the spoof Scary Movie. We won’t go into detail about the film or its awful sequels. Nowadays, practically everyone can identify the mask that the Ghostface killer used since it has become something of an emblem for Halloween and horror films.
It therefore makes perfect sense for you to use it to decorate your home for Halloween, whether you’re just using it to light a candle inside and place it on your doorstep or taking it inside and utilizing a less combustible source of light, such an LED light. It will undoubtedly terrify your visitors, and trick-or-treaters may be hesitant to hurl eggs at your front door or cover your home in toilet paper.
Fortunately for you, this pumpkin carving design isn’t too challenging to complete; all you have to do is cut the holes to correspond with the holes in the Ghostface mask. This design doesn’t rely on thinning the pumpkin’s shell as previous ones do; instead, it just requires cutting holes, which you can perform with a sharp knife or a portable CNC machine (such as a Dremel). Use transfer sheets or stencils if required to protect your fingertips from the blades.
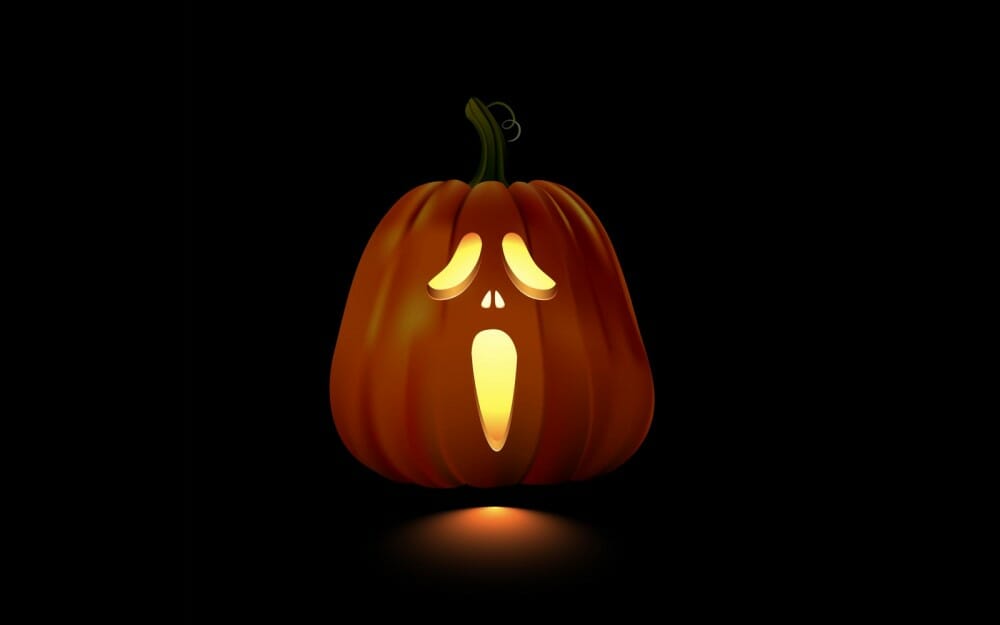
Spooky Ghost Pumpkin

The wonderful thing about this frightening ghost pumpkin design is that it gives you the freedom to use all of your creative creativity. Ghosts don’t need to be flawless; in fact, the more unsettling and asymmetrical the ghost, the better.
Feel free to immediately draw on your pumpkin. Draw a design on the fly. What about ghosts particularly frightens you? Use a template if you’d prefer to stay with something tried and true. You may print off a ton of images from the internet, including our Bendy Ghost Template. Trace the pattern by taping it on the pumpkin. Press firmly enough to make a mark on the flesh while cutting along the lines.
Bat Attack
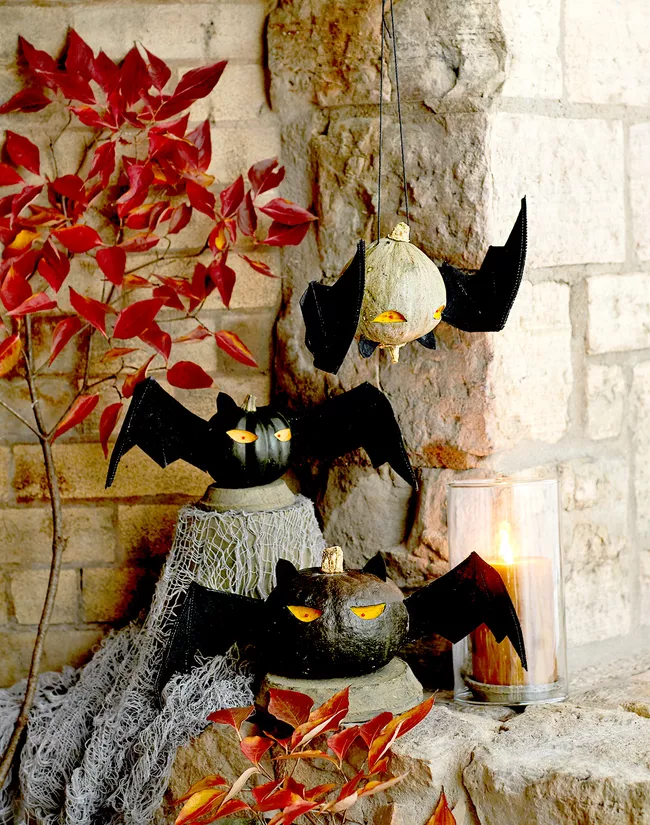
Little pumpkins are transformed into adorable bats by attaching felt wings and ears with toothpicks. The eyes are etched out, then red sewing pins are inserted in the middle of each to produce beady stares. The bodies are painted black, giving the eyes the appearance of glowing even during the day.
Jack Skellington – Cool Pumpkin Carving
You might be familiar with Tim Burton’s The Nightmare Before Christmas and its two major characters, Jack Skellington and Sally, if you’re a kid at heart. Although it’s unclear how a character from a Christmas movie managed to make it into Halloween (well, I suppose it’s because it’s kind of creepy), people seem to adore Jack Skellington as a Halloween decoration, whether it be through dressing up as it, painting it on walls and other surfaces, or even carving its face into pumpkins.
You may carve and display this pumpkin on your front lawn, porch, or even bring it inside if you’re hosting a party and want something lovely to create the tone for your visitors. Jack appears to be a perfect pick for any given Halloween scenario, whether you’re trying to be frightening or funny about it.
Although most people would mistake it for a typical skeleton face, you’ll undoubtedly start a conversation with those who have seen the movie, particularly if they’ve seen it several times and are fans of the character.
The fact that you don’t have to be Michelangelo to execute this pumpkin carving design makes it much better. Even better, sketch the pattern on the pumpkin before you begin carving it to ensure that your cuts are precise and the final product is more appealing.
Additionally, as you must make complete cuts to the pumpkin’s core, you can use a knife or a portable CNC machine, depending on the situation. Regardless of the tool you use, take caution and safety equipment at all times.
How to Make Pumpkin Diorama
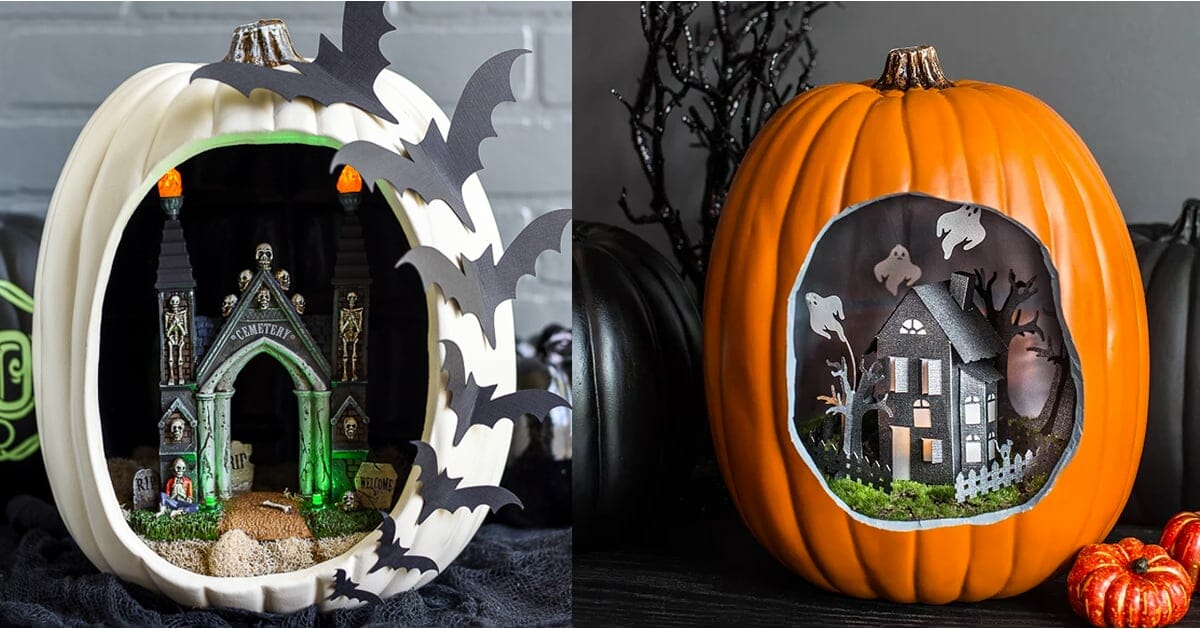
Discover how to slice a pumpkin into a Diorama and use our collection of creative pumpkin carving ideas to make this Halloween more spookier and more enjoyable! You might think it would be difficult to create or expensive, but trust us when we say this is a simple and inexpensive concept to try this year.
Large pumpkin, black paint, Halloween decorations, and a block of Styrofoam that is one inch thick are all items on the supply list for this wonderful creation. Bats, moss, and hot glue. apumpkinanda
‘Brace’ Yourself With A Toothy Design
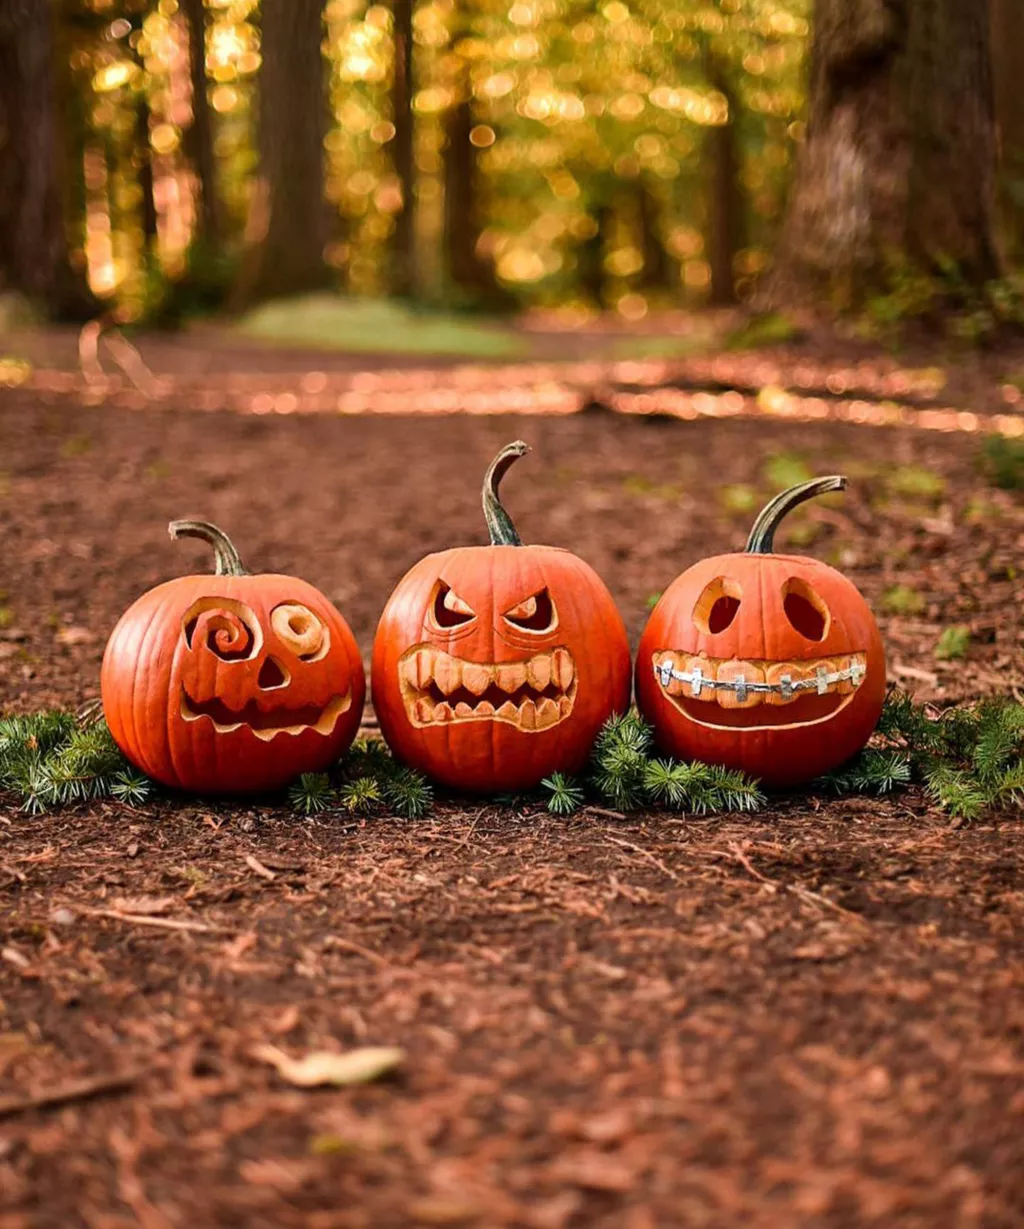
While we adore all three of @morning.sophie’s pumpkin carving suggestions. We really like the foil-braced orange face that has had orthodontic work done by its owner.
In addition to the train tracks, we appreciate the attention to detail used to add texture to the design’s “teeth”; this may be done using a fork or paring knife.
Cyclops – Jack-O-Lantern Faces
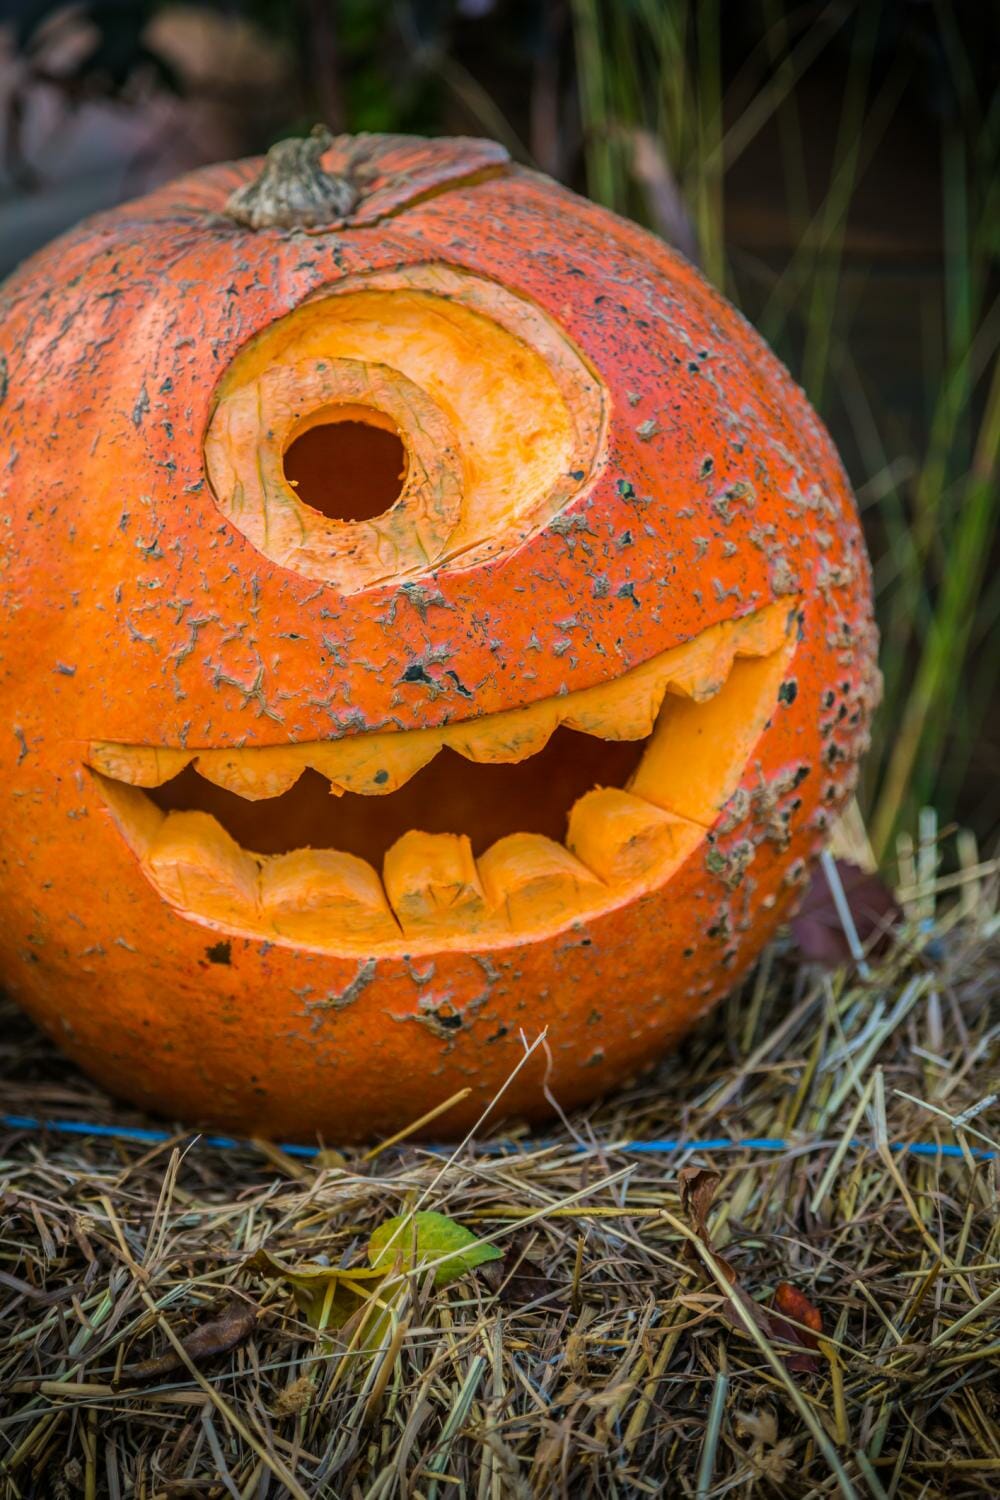
When you want to have a lovely Halloween party for your visitors (or for kids) or wait for youngsters to come trick-or-treating without scaring them away with your overly realistic decorations, this design works best. Since it only has one eye, like the fabled creature, we now refer to this design as a cyclops.
However, Mike Wazowski, one of the movie’s primary protagonists, is clearly a strong influence on it. That is precisely why we mentioned that a lovely Halloween party would be preferable to a terrifying one.
The example in our photo above suggests that you’ll need to put some effort into it; so, merely slicing the pumpkin and drilling holes into it won’t be sufficient to pass the time at this point. You should be careful how far you drive the carving knife or CNC machine on it since, as you can see, the design has different depths for the eye and the teeth. Working with layers is advised since it is much easier than freehanding the whole carving design.
For the eye, for instance, just drill the center portion first, then carve around it by drilling all the way through the pumpkin without breaking it, and smoothing off the entire surface. Moving on to the next layer is possible if you are happy with the outcome; otherwise, you can continue carving the current layer a little deeper and then smooth up the surface before continuing. You may place a light source inside the pumpkin to see if the depth is appropriate and allows light to pass through.
Halloween Pumpkin Topiary with Spiders
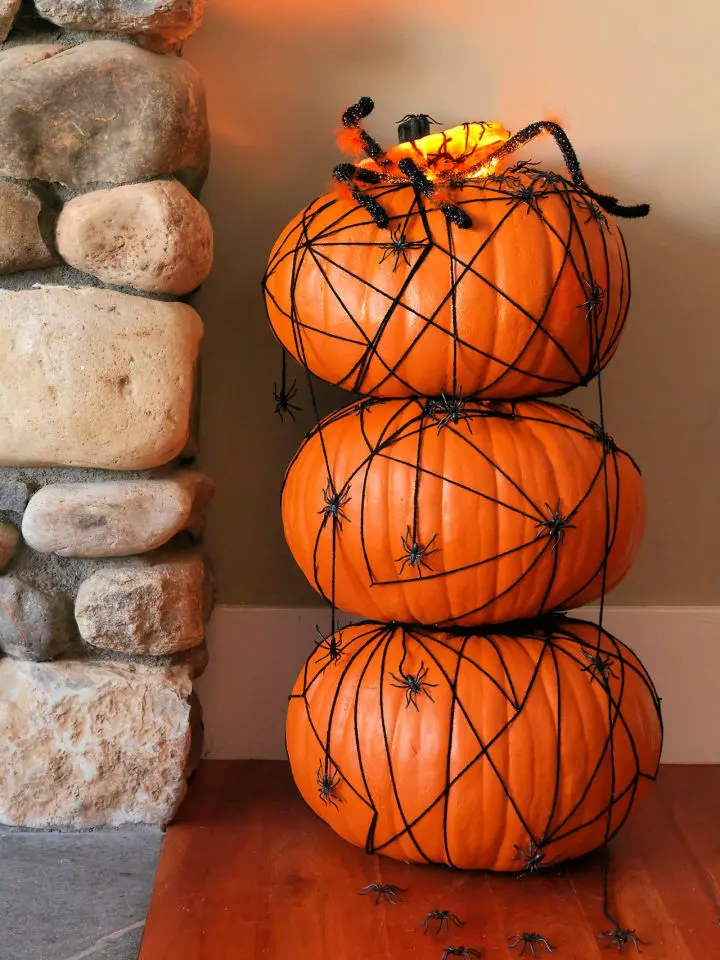
This year’s Halloween party would be enhanced greatly by the inclusion of this interesting and distinctive Halloween pumpkin topiary with spiders. This strategy is uncomplicated, and anyone may test it out by following clear, uncomplicated procedures that don’t need for special knowledge.
Additionally, it is a highly cost-effective design that is ideal for people who adore Halloween décor but have a limited starting budget. For this project, you’ll need mock pumpkins that have been carved, straight pins with black tips, a flashlight, black yarn, tiny and big plastic toy spiders, a serrated knife, scissors, and a hot glue gun.
Carve The Top Of Your Pumpkin
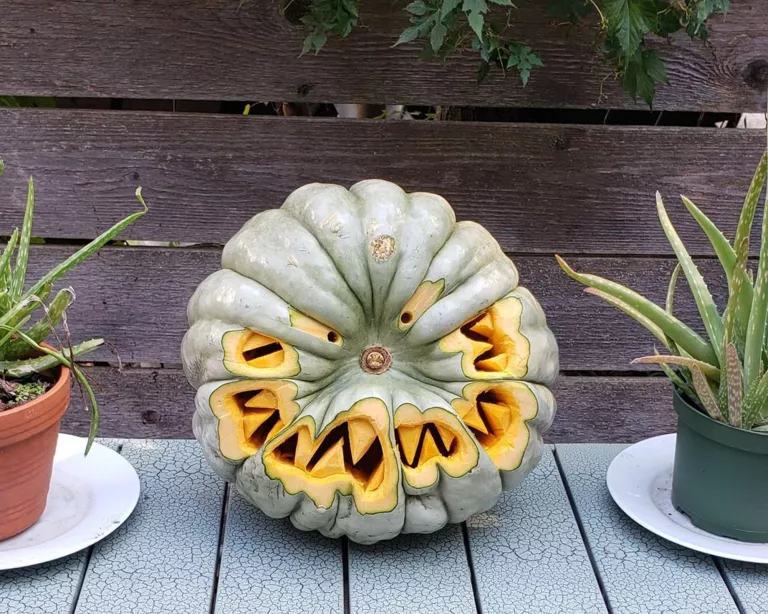
We frequently utilize the gourd’s top as the lid or the head of our creations; some people even go so far as to employ the insides in grotesque or gory ways. But turning this work completely on its head is another way to approach it.
So attempt to chop face characteristics into your squash instead of giving it a lobotomy. It’s one of those basic pumpkin carving ideas that few people actually use. If you choose your own pumpkins from a farm or pumpkin field, you could even leave the stem in place to represent a bony nose.
This Jarrahdale pumpkin type pairs well with grey, blue, and green decorations, and its zombie-like tint works best if you’re looking for spooky ideas.
Dead Pumpkin – Simple Pumpkin Carving
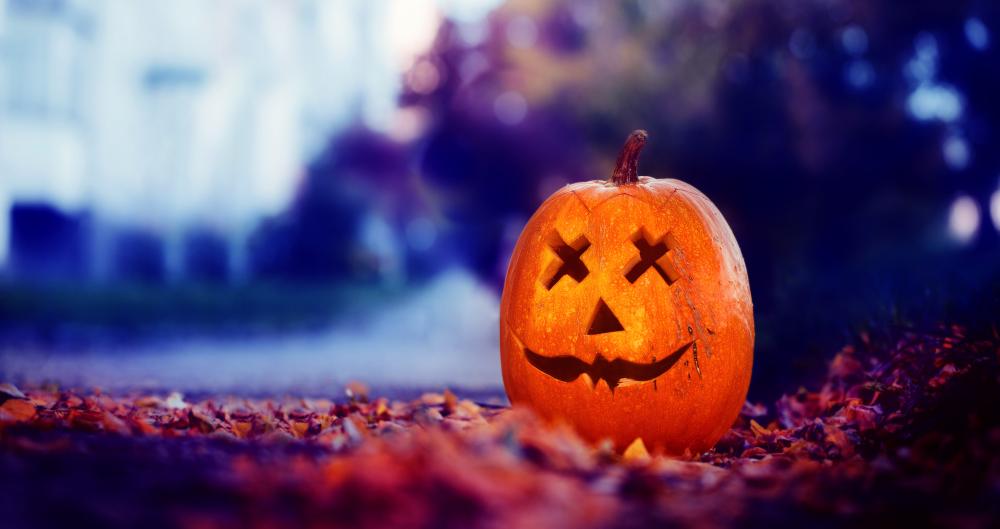
In cartoons, one of the most typical methods to represent death is the “x for eyes” look. If you want to go with the dead pumpkin aesthetic for Halloween, you may carve a couple of xs for eyes instead of the typical round or demonic eyes you’ve been carving your entire life. You have undoubtedly seen it a thousand times by now that when a character dies, its eyes turn into a pair of xs.
The sheer simplicity of its design is one of its best features. For this one, you don’t need to go overboard with intricate designs and patterns; you can simply carve the pumpkins the same way you’ve always done, but instead of drilling out round or irate eyes, you just draw the letter “X” for each one. It will undoubtedly cause some waves of laughter from other partygoers or the children who will come to your house for Halloween trick-or-treating.
Objects like a green-painted bottle with a skull sticker on it, some bloody tools (props, of course; we wouldn’t want to risk damage), or anything else you can think of may be placed next to the pumpkins to further hint at the cause of their demise. It’s Halloween, so adding a dash of the eerie to the meal is appropriate. We’ll leave it totally up to you as to whether or not you want to add the extras, though.
Haunted House Carved Pumpkins
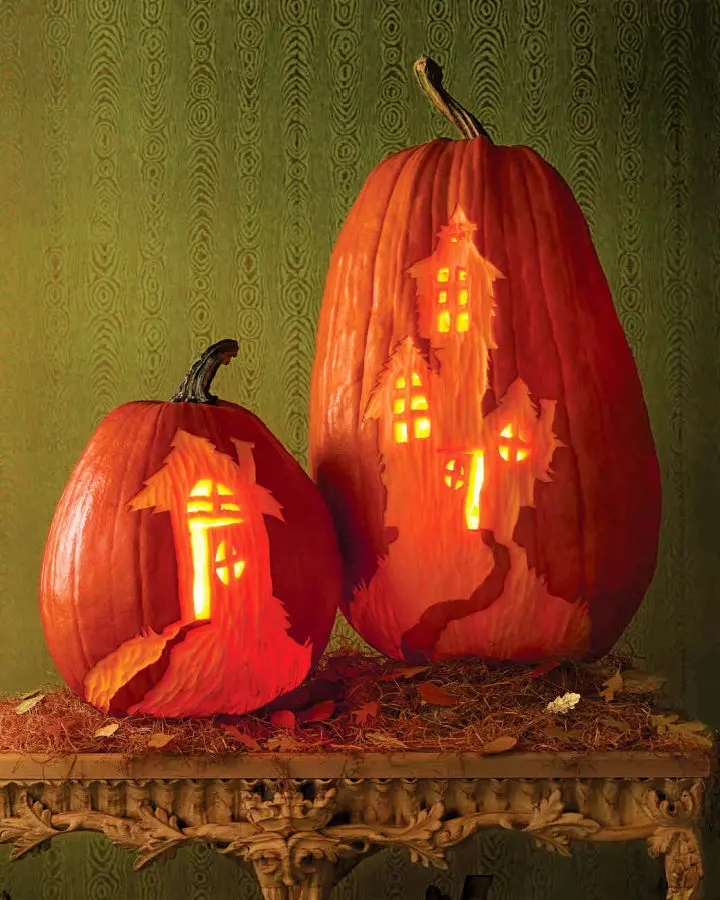
Halloween and haunted homes have a lot in common, so why not mix the two? Pick a tall pumpkin to carve so that your artwork will be even more stunning and lifelike. Carve a haunted home on it. Use materials like haunted home templates, pumpkins, keyhole saws, scissors, fleshing tools, masking tape, T-pins, needle tools, tiny saws, Linoleum cutters, electric twinkling lights, and glass jars to create spooky crafts.
Creepy Mask – Cool Pumpkin Carving Ideas
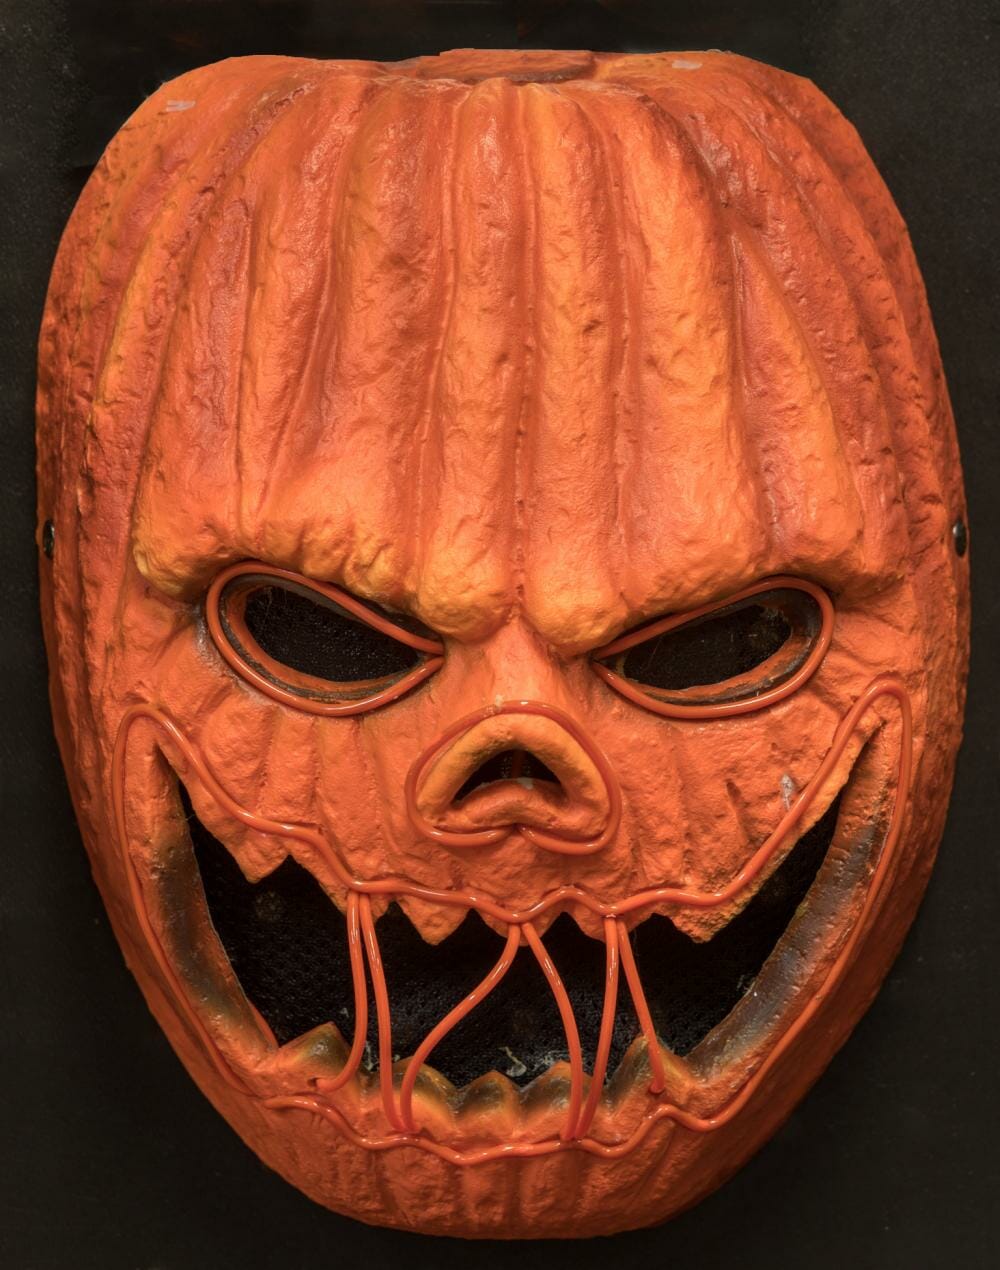
One of the most realistic mask designs we’ve provided in this tutorial is the one you can see in the image we’ve attached, so making it will need a lot of patience, as well as perhaps some creative ability and/or pumpkin carving expertise. However, the final product will undoubtedly astound your visitors and frighten trick-or-treaters who dare approach your home this Halloween to ask for candy. I believe that is the spirit.
Although it is evident that the object in our image is a mask (perhaps made of foam), it is quite simple to modify the design and use it on your pumpkins. Sure, you’ll have to be especially careful since this design has a lot of really delicate features (like the wires holding the mask’s lips together), and you’ll need to use your carving knife very carefully (although a handheld CNC machine would be infinitely better in this situation).
As an alternative, you might only concentrate on the other portions of the mask (the eyes and the mouth itself) and close the lips with thicker thread, wire, yarn, or rope. If you do that, just be careful not to put a candle inside the pumpkin since the additional stuff that isn’t a pumpkin would undoubtedly catch fire. Use something that doesn’t produce as much heat as a candle or a standard incandescent lightbulb, such as an LED light.
Skull Jack O Lantern

This year, will you be hosting a Halloween party at your home? Rock your decorations by including this fantastic Halloween pumpkin carving in the shape of a skull. Additionally, they are the finest item to create on a tight budget and are ideal for kicking off the scary season of the year.
Making this amusing lantern will no certain be a lot of fun for you. A pear-shaped pumpkin, votive candle, angle grinder, dry-erase markers, ice cream scooper, handsaw, sander, carving tools, and knife are a few of the materials you’ll need to produce this masterpiece.
